In order to get the best quality prints it’s important to know the correct temperature to print each filament at. Even just a 5c change can make all the difference to the performance of a filament. Here’s how to slice and print a ‘temp tower’.
Thingiverse has hundreds of different variants of temp towers, here’s the one I used. There’s different types of towers to invoke different characteristics such as stringing tests, bridging tests, etc. A temp tower prints anywhere from 10-20 layers at one temperature then lowers by a set amount and repeats until complete. In this way you end up with a single model that starts off too hot at the bottom and maybe a little too cold at the top.
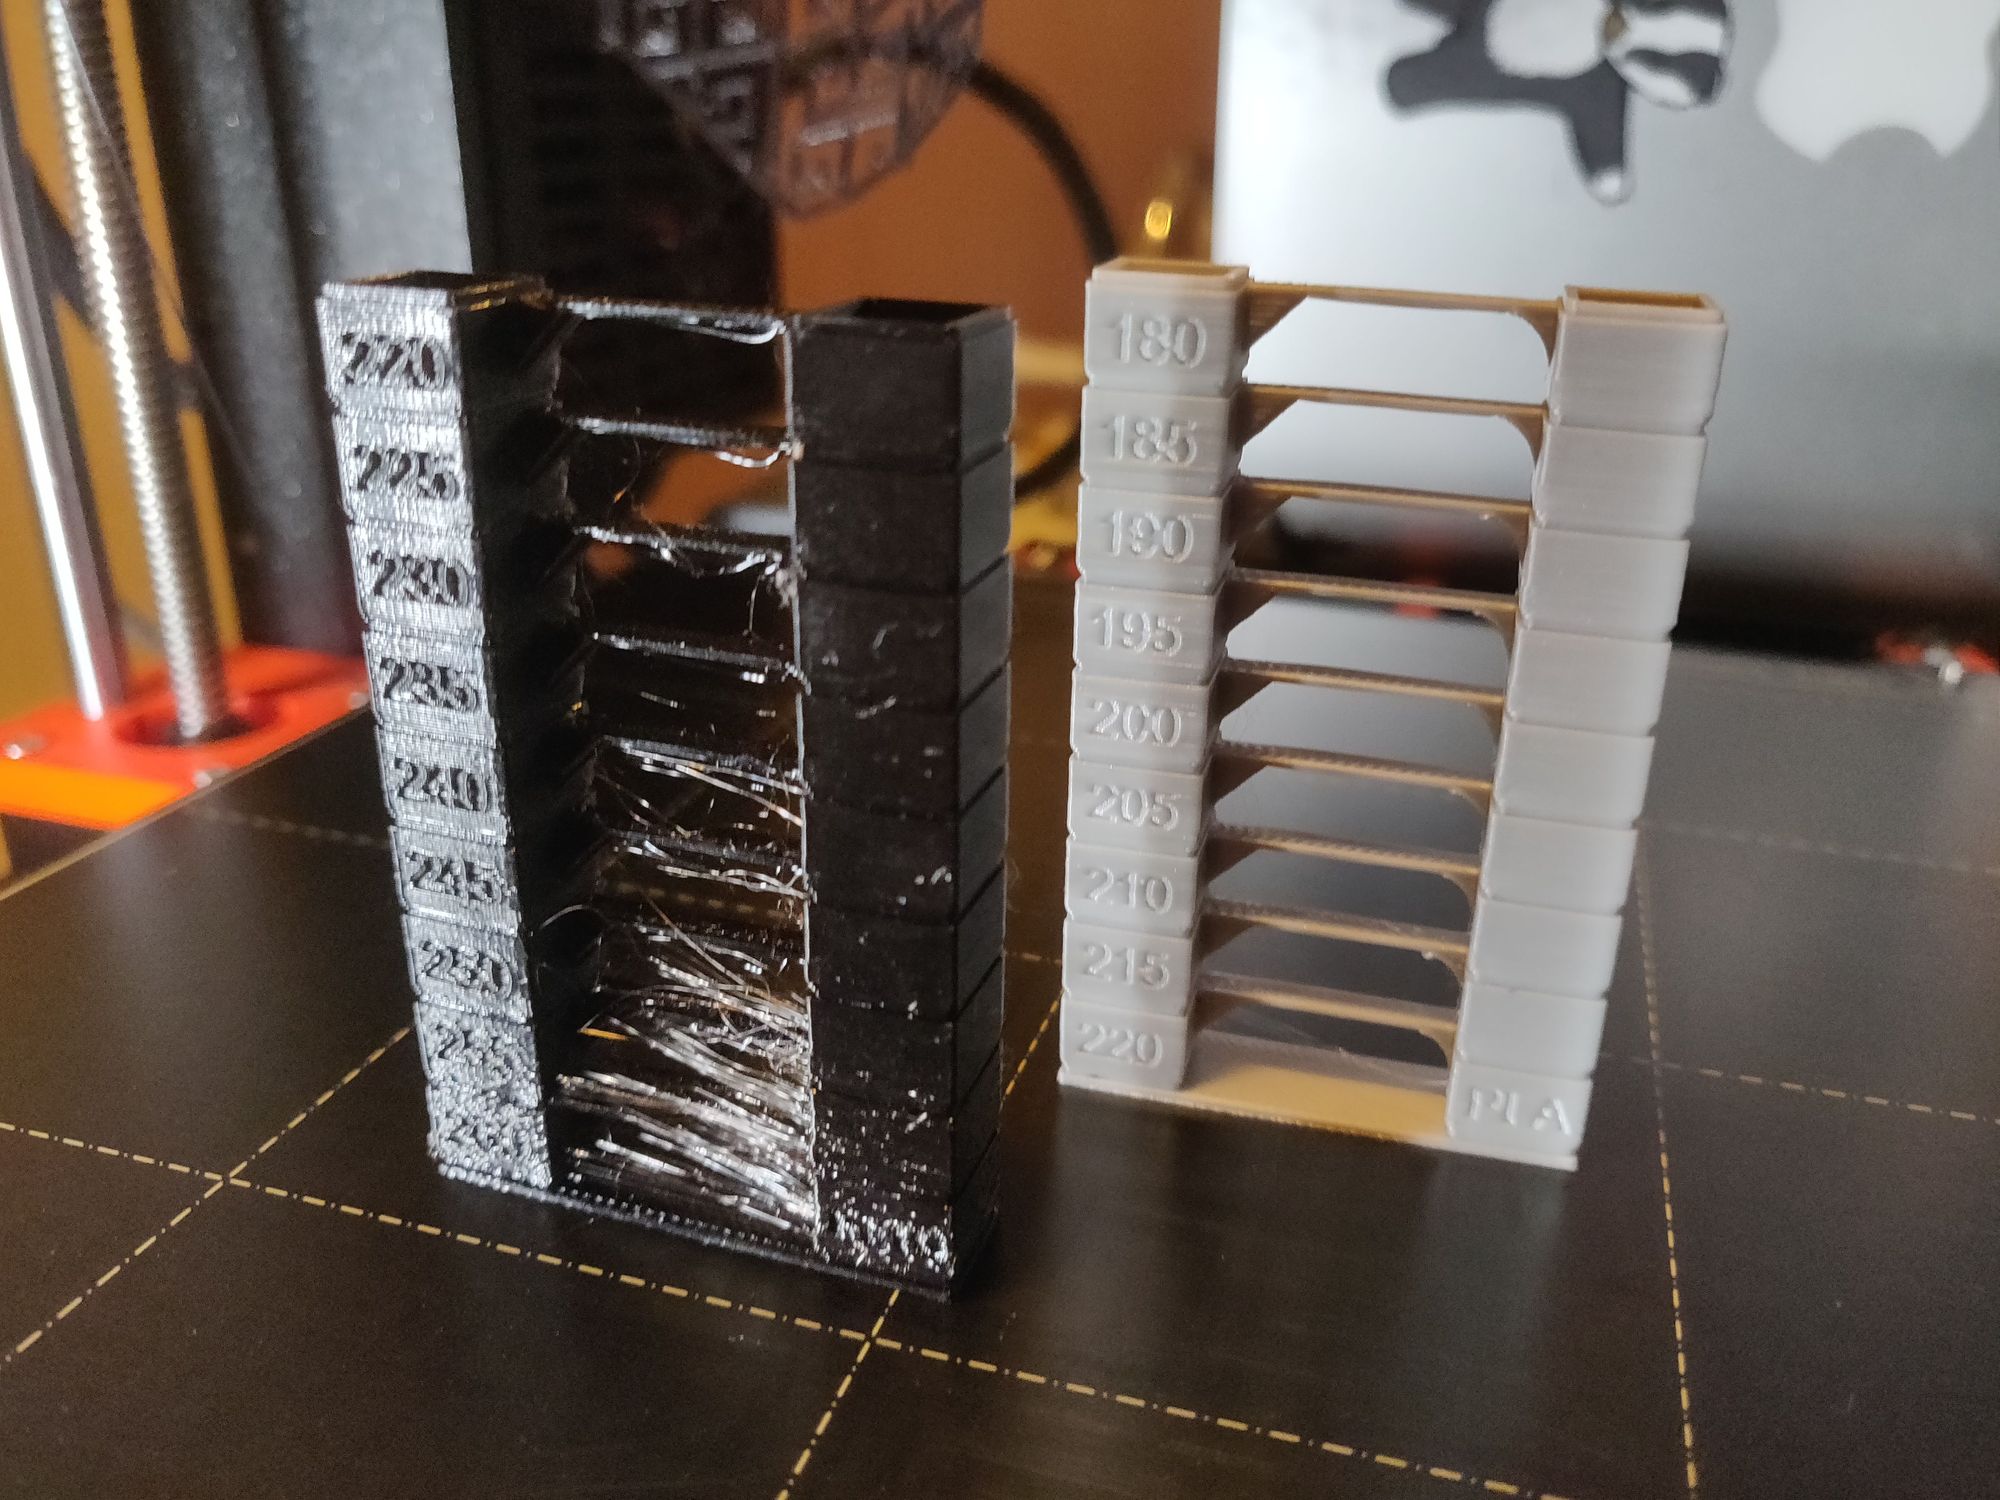
By examining the finished print we can ascertain which temperature has the most desirable qualities for any particular filament. Filaments vary considerably from manufacturer to manufacturer and sometimes even batch to batch so it’s worth taking the hour or so to print out a tower every time you get a new roll to see what’s optimal, and what isn’t.
Slicing
The only tricky part here really is slicing the model so that your printer knows to change temperatures every few layers. To do this you’ll need to find the custom g-code section in your slicer.
I’m using PrusaSlicer 2.0 (the newly released one) and this is found under settings -> Printer Settings -> Before layer change G-code. Once there we need to inject some custom code to tell the printer what temperatures we want to calibrate for at which layer. Here’s the code you need:
;BEFORE_LAYER_CHANGE
G92 E0.0
;[layer_z]
{if layer_z == 0.8}M104 S220{endif};
{if layer_z == 7.8}M104 S215{endif};
{if layer_z == 14.6}M104 S210{endif};
{if layer_z == 21.40}M104 S205{endif};
{if layer_z == 28.0}M104 S200{endif};
{if layer_z == 34.8}M104 S195{endif};
{if layer_z == 41.4}M104 S190{endif};
{if layer_z == 48.2}M104 S185{endif};
{if layer_z == 55.0}M104 S180{endif};
This example is for PLA (PETG is at the end). Simply adjust the Sxxx number as required for the temperature of each layer. The code should be fairly self explanatory but the gist is that if the printer detects layer_z matches the specified height it will change the temp to the value of Sxxx. To find your layer_z height slice your model and then in the print preview mode use the slider to find which layers you need to change temperatures at. Ensure that the layer_z value is divisible by your layer height else you might never actually have layer_z match the if statement, which would be kind of pointless.
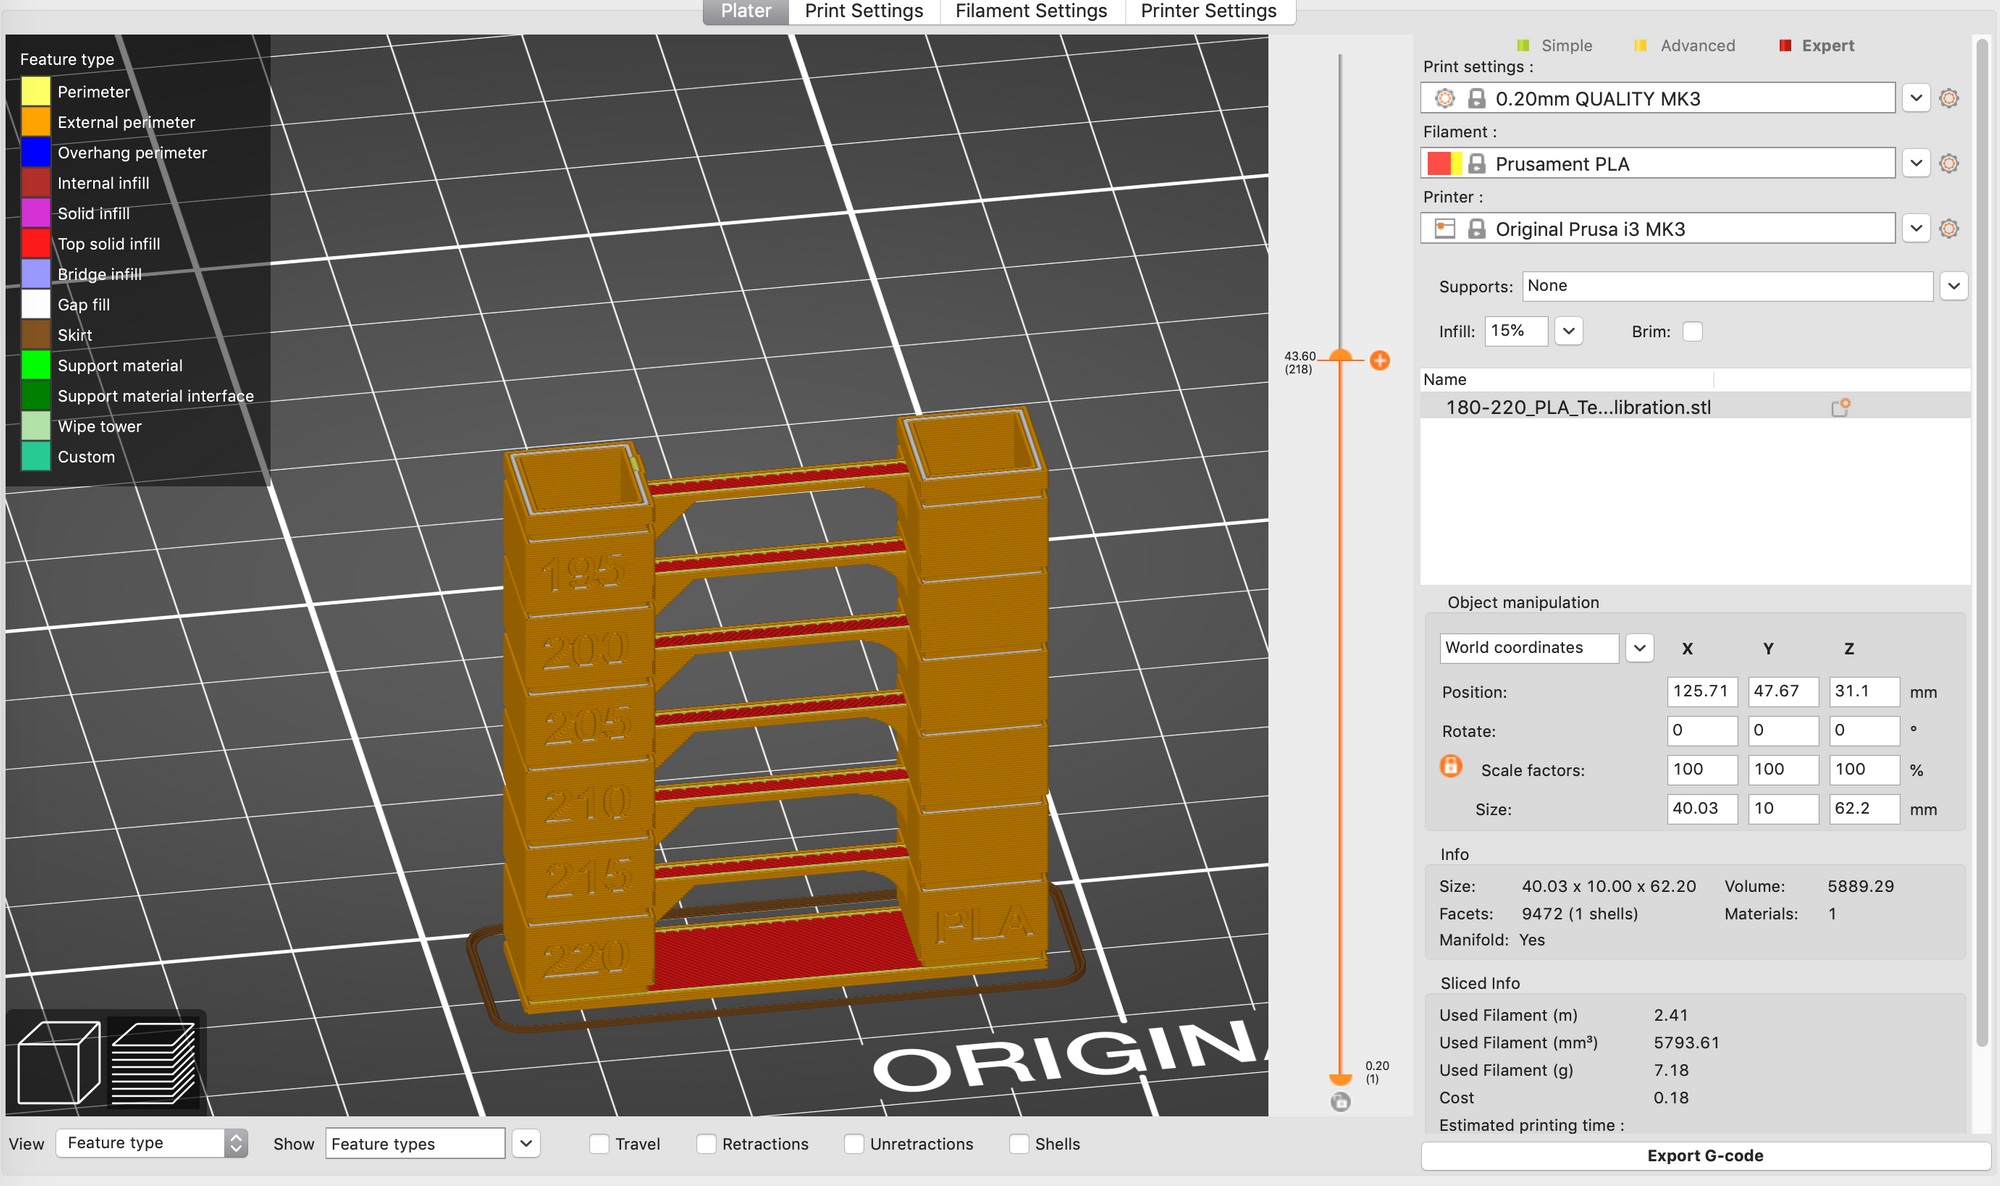
layer_z valueFor example if printing 0.2mm layer height using any if logic divisible by 0.2 is fine such as I have above. But if, for some reason, you chose to print 0.15mm layers you’d need to ensure that your if statements only target layers divisible by 0.15mm such as 1.5mm or 3.15mm, not 3.2mm for example.
That’s it. Happy printing!
PETG G-Code
;BEFORE_LAYER_CHANGE
G92 E0.0
;[layer_z]
{if layer_z == 0.8}M104 S260{endif};
{if layer_z == 7.8}M104 S255{endif};
{if layer_z == 14.6}M104 S250{endif};
{if layer_z == 21.40}M104 S245{endif};
{if layer_z == 28.0}M104 S240{endif};
{if layer_z == 34.8}M104 S235{endif};
{if layer_z == 41.4}M104 S230{endif};
{if layer_z == 48.2}M104 S225{endif};
{if layer_z == 55.0}M104 S220{endif};