Far too many bland IKEA setups exist on the internet. People express their creativity by populating rooms with identical furniture and funky coloured LEDs. But one thing strikes me above all else with these “clean and minimal” (don’t get me started on the true definition of minimalism) setups, do people actually use them to get work done? To make things? Or just consume? Nothing wrong with that, it’s just not who I am.
Part 1 of the Mega Desk saga is over here
I needed a space where I could explode an entire computer, or 3d printer, or some other overly complex piece of equipment without getting in the way of the rest of the house. Of course I’m talking about “project space”. A luxury since moving to the US, space is now something I am not short of and here’s how I have revamped my tinkerspace to cram in as many hobbies as possible.
Function over Form
Listing my primary hobbies in no particular order:
- 3D printing
- Drone Racing
- Photography
- Computer Builds
- Electronics
- Woodworking
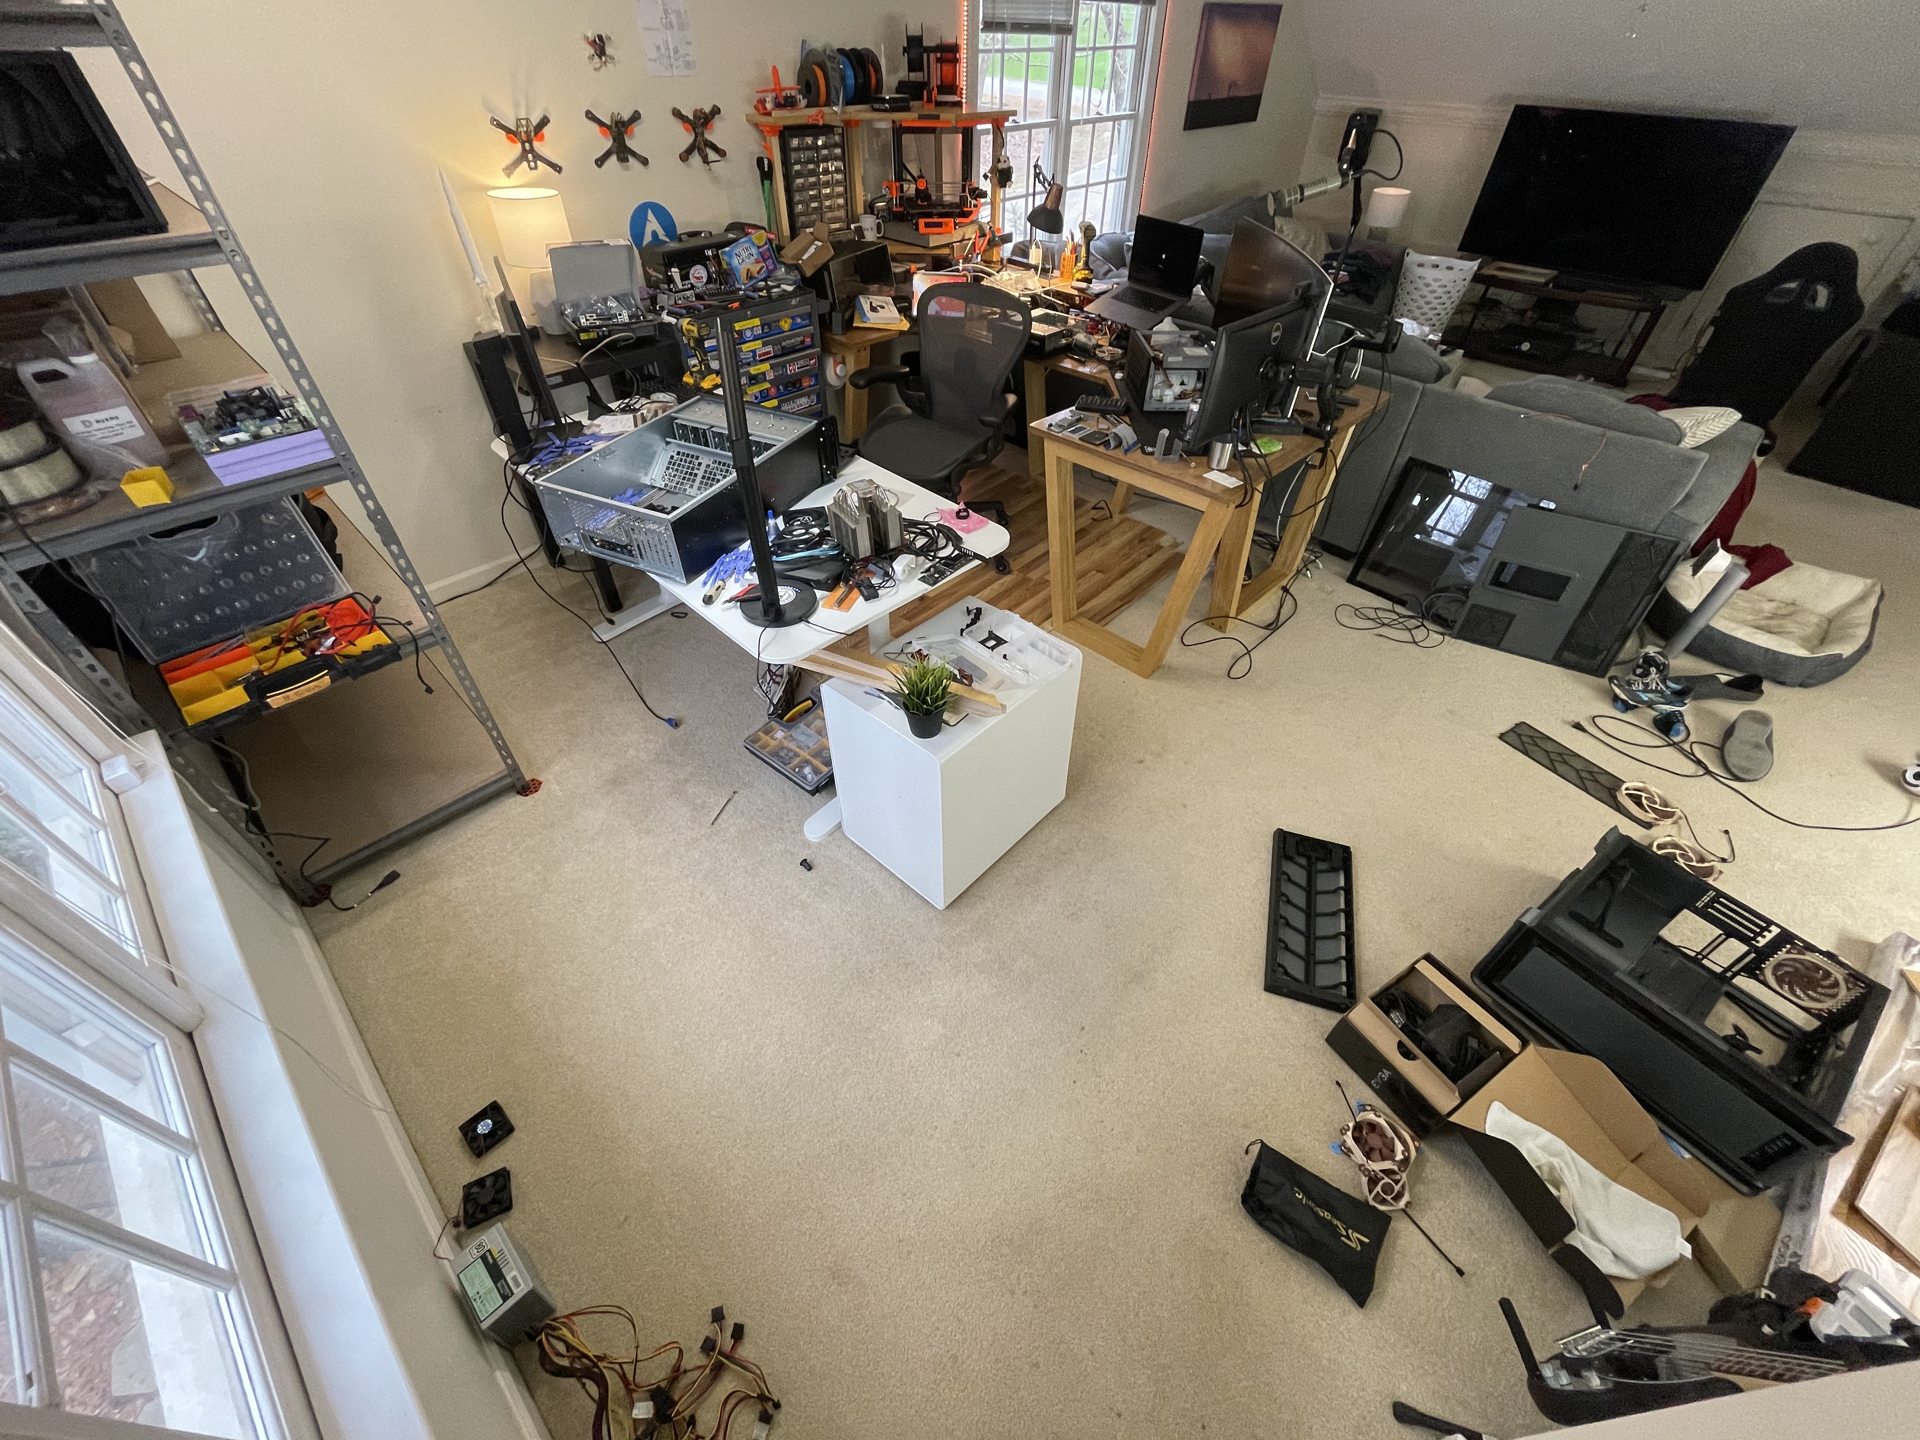
Something I didn’t appreciate for too long is that hobbies require stuff. Stuff is the enemy. And without a home, stuff accumulates slowly, slowly until suddenly, every horizontal surface is covered with stuff. Here’s a recent shot I took 3 months ago whilst I was balls deep in a recent triple server/PC build, perhaps you can see what I mean?
With this new build I have tried to over provision drawers and space in general. There are empty drawers! Ready for new hobbies!!
Design considerations
When thinking about this space I wanted to create various “stations”. I never need my soldering iron when working on computer hardware but I do when finishing up an electronics project I just 3d printed an enclosure for.
Here’s a list of the stations I created and their primary use cases:
- Main computer station
- My day job
- Podcasting
- Writing blog posts! and other misc tinkering
- PC hardware and SBC station
- Power, ethernet, peripherals and a display always easily available
- Must be within reach of lots of small parts storage
- Maker station
- Soldering iron, hot air station, hot glue gun
- This is where I build stuff like drones and electronics projects
- 3d printing station
- A dedicated home, out of the way, for my 3d printers and all their accoutrement
- Floating work table - coming soon
- A 3ft by 3ft work table on wheels built in the style of a Paulk workbench
- Provides a massive project work area for those larger builds
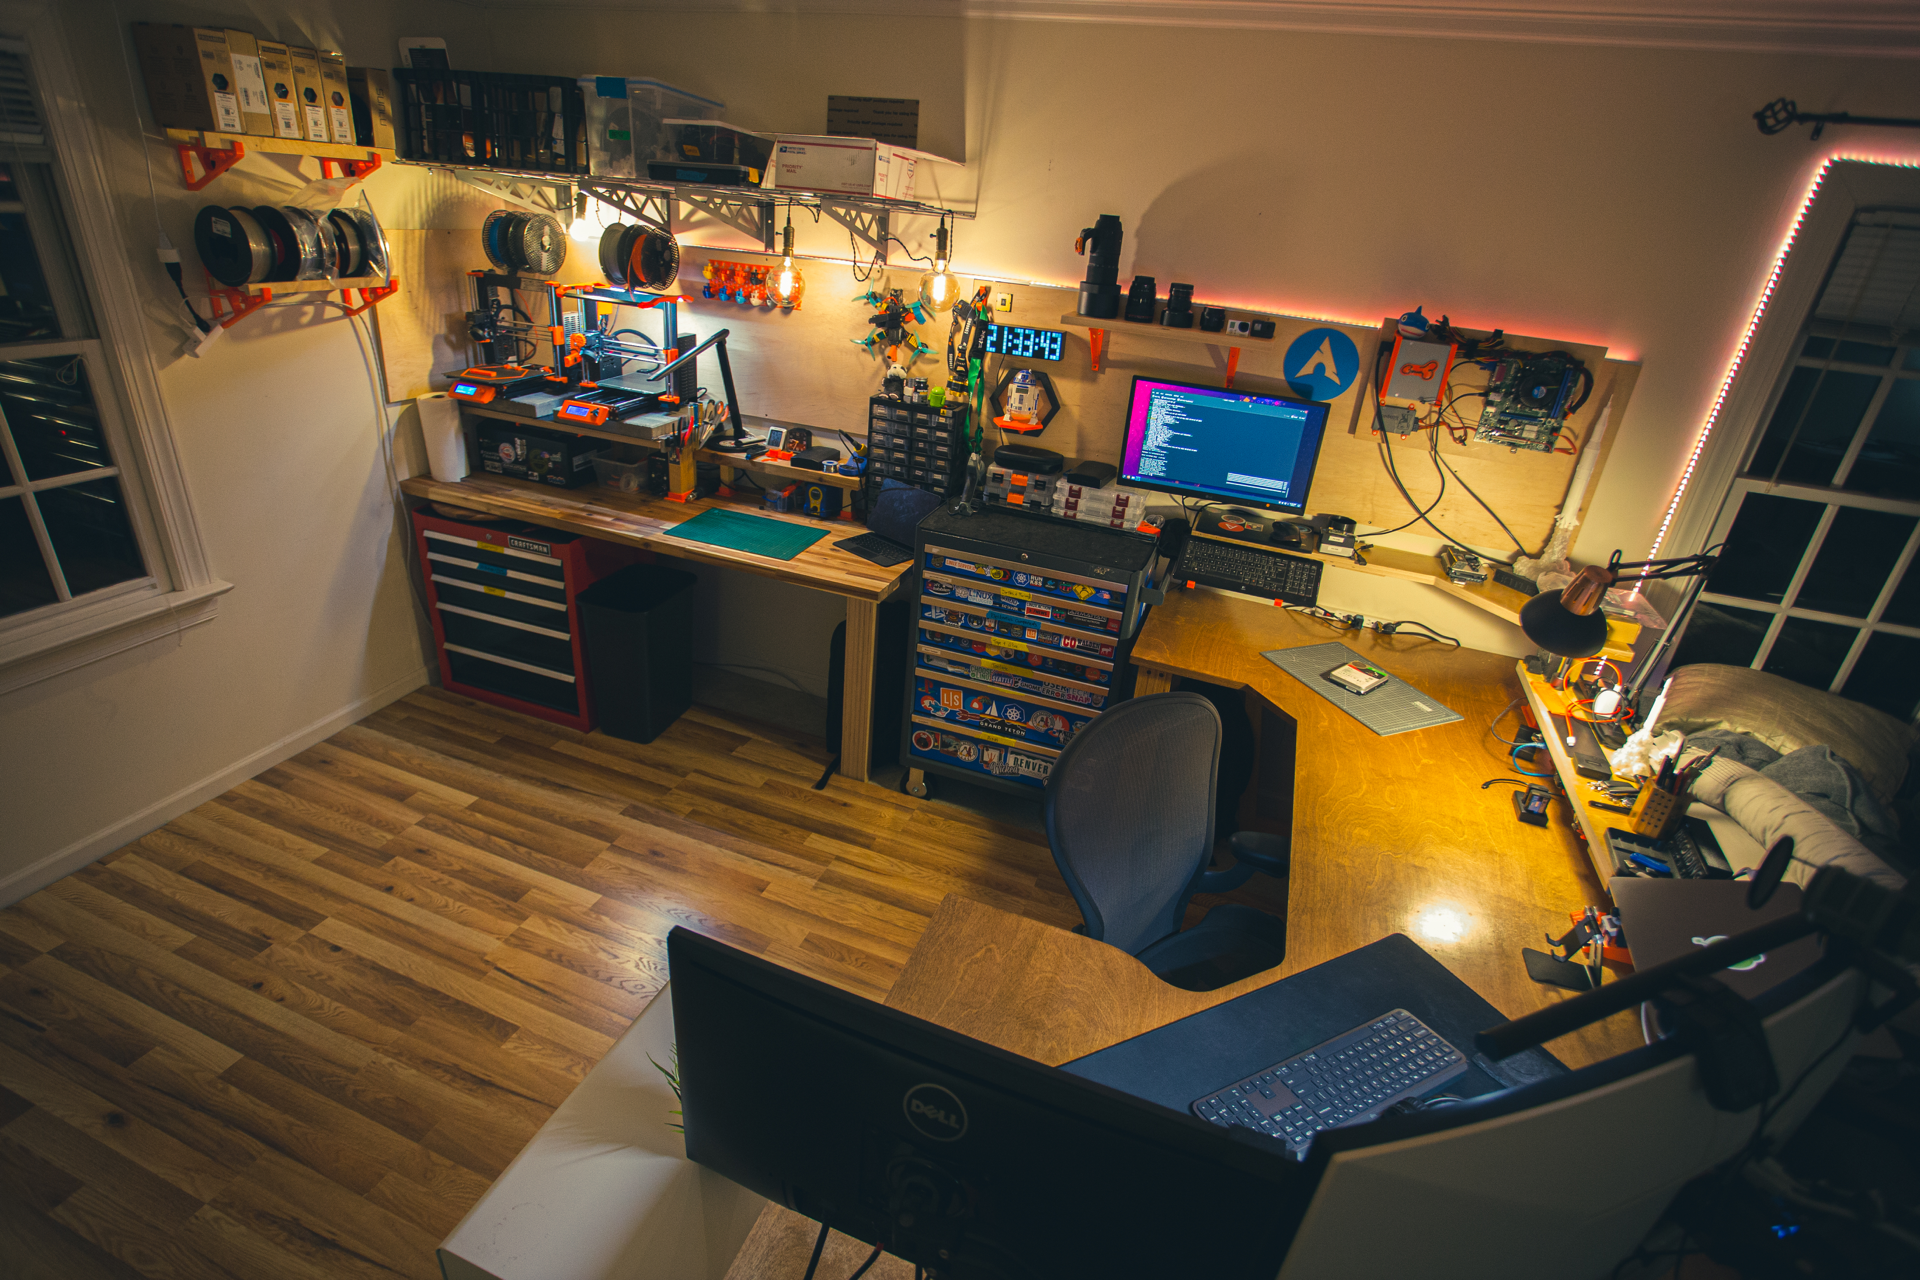
By grouping these logical types of tasks together I’ve been able to divide the space up into zones and try to ensure that the items required for those activities are within arms reach of that station.
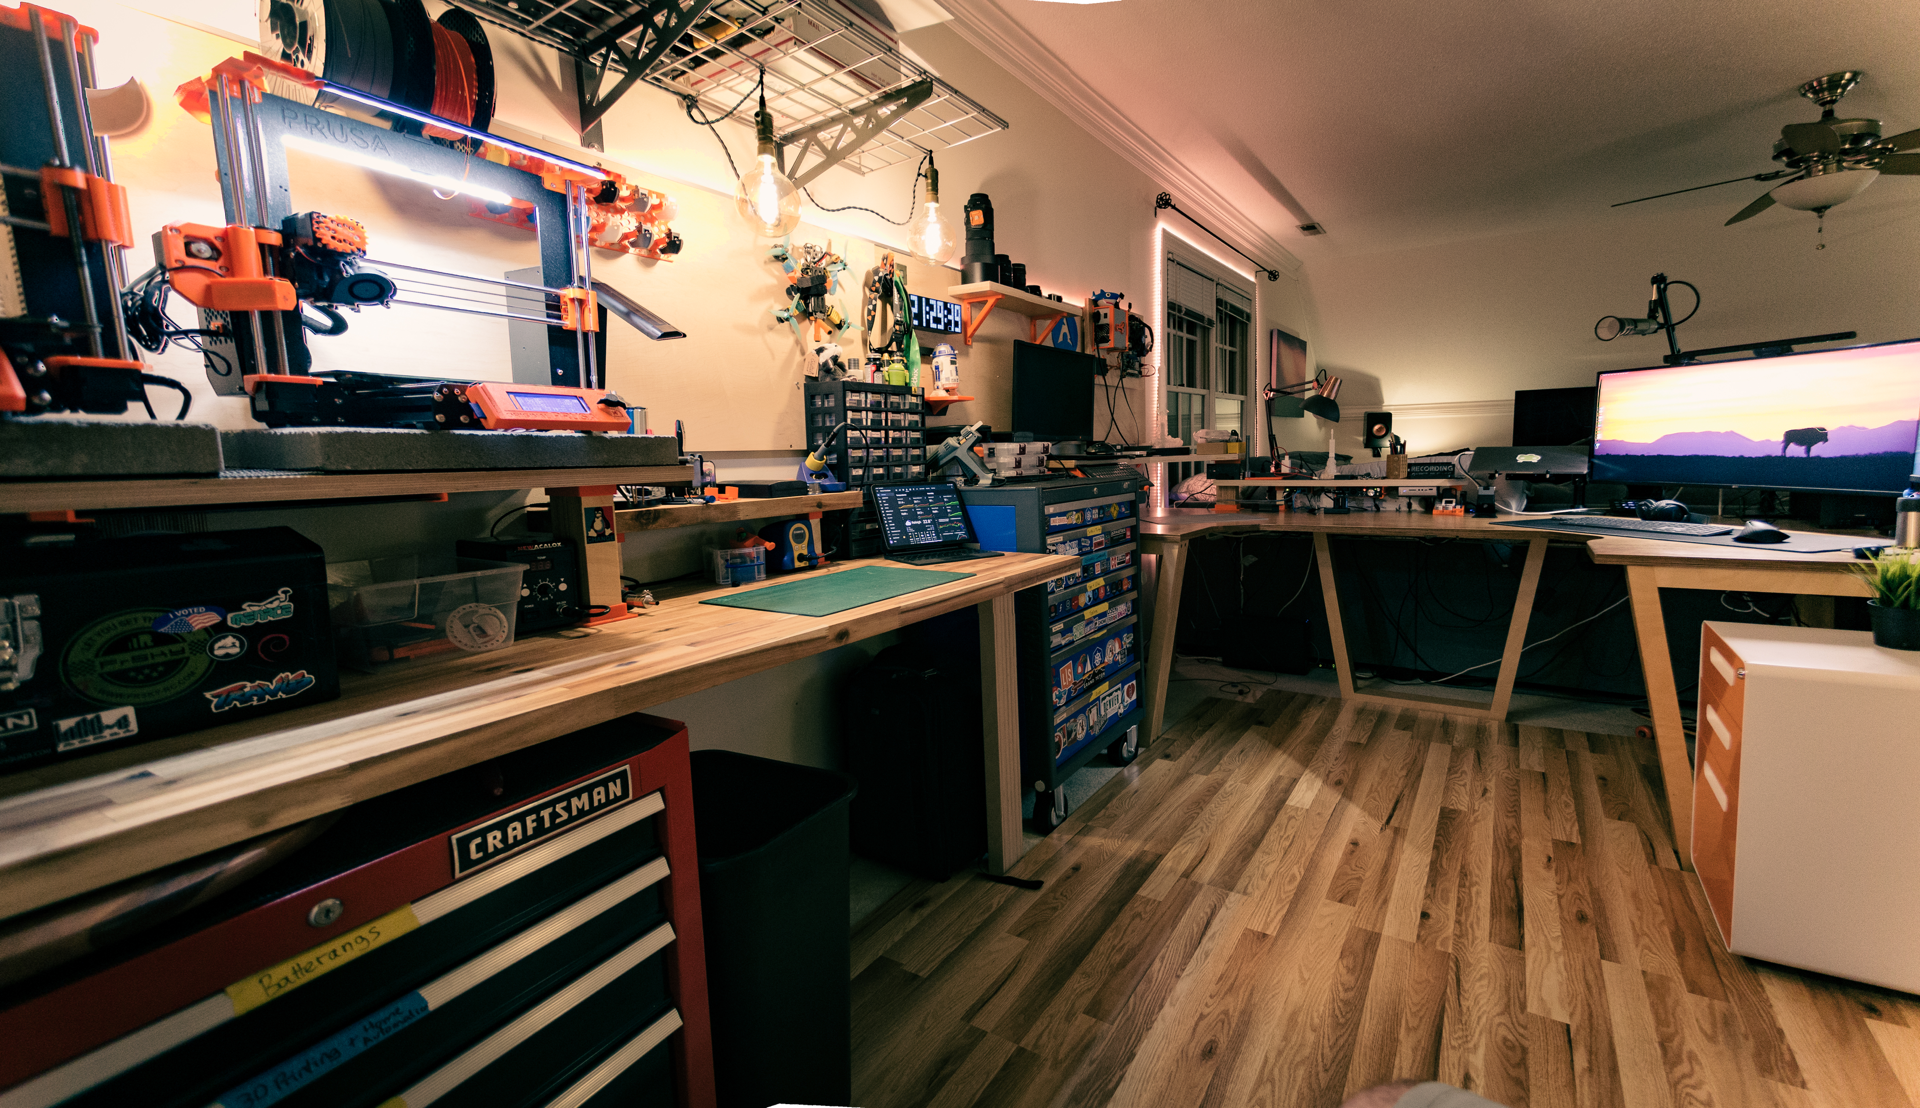
For example, the blue chest (covered with stickers), contains things I’ll need for PC building and electronics projects. However the red chest contains things for 3D printing and racing drone builds, things I’ll never need over at the ‘computer desk’.
Flooring
I didn’t want to lift the thick, squishy carpet in this room. My solution was to place 1/4” plywood on top of the carpet and then click ‘n lock laminate flooring over the top. Much better than those rigid plastic sheets you see people wheeling around on. Also worth considering is the amount of floor area I needed to cover, quite a bit. This required 5 packs from Home Depot to create.
I have extended the flooring out a long way as I will be building a floating work table in a similar style the modified Paulk workbench I wrote up the build of for my woodworking shop. One thing at a time though!
The Desk(s)
The primary megadesk is a single 8x4 sheet of marine grade plywood which was stained and finished with Polyurethane in our previous rental house. I do eventually plan on replacing it with a fancy epoxy river table that I’ll make. But that’s going to take a lot of time and effort and probably money (like everything else) and this one does the job very nicely for now.
As this megadesk was all we could fit in the last place it had to serve multiple functions all at once. It was a tight fit but I made it work, as you do. I handcrafted the legs by laminating several strips of plywood together, making some jigs and then gluing them together it trapezoidal shapes.
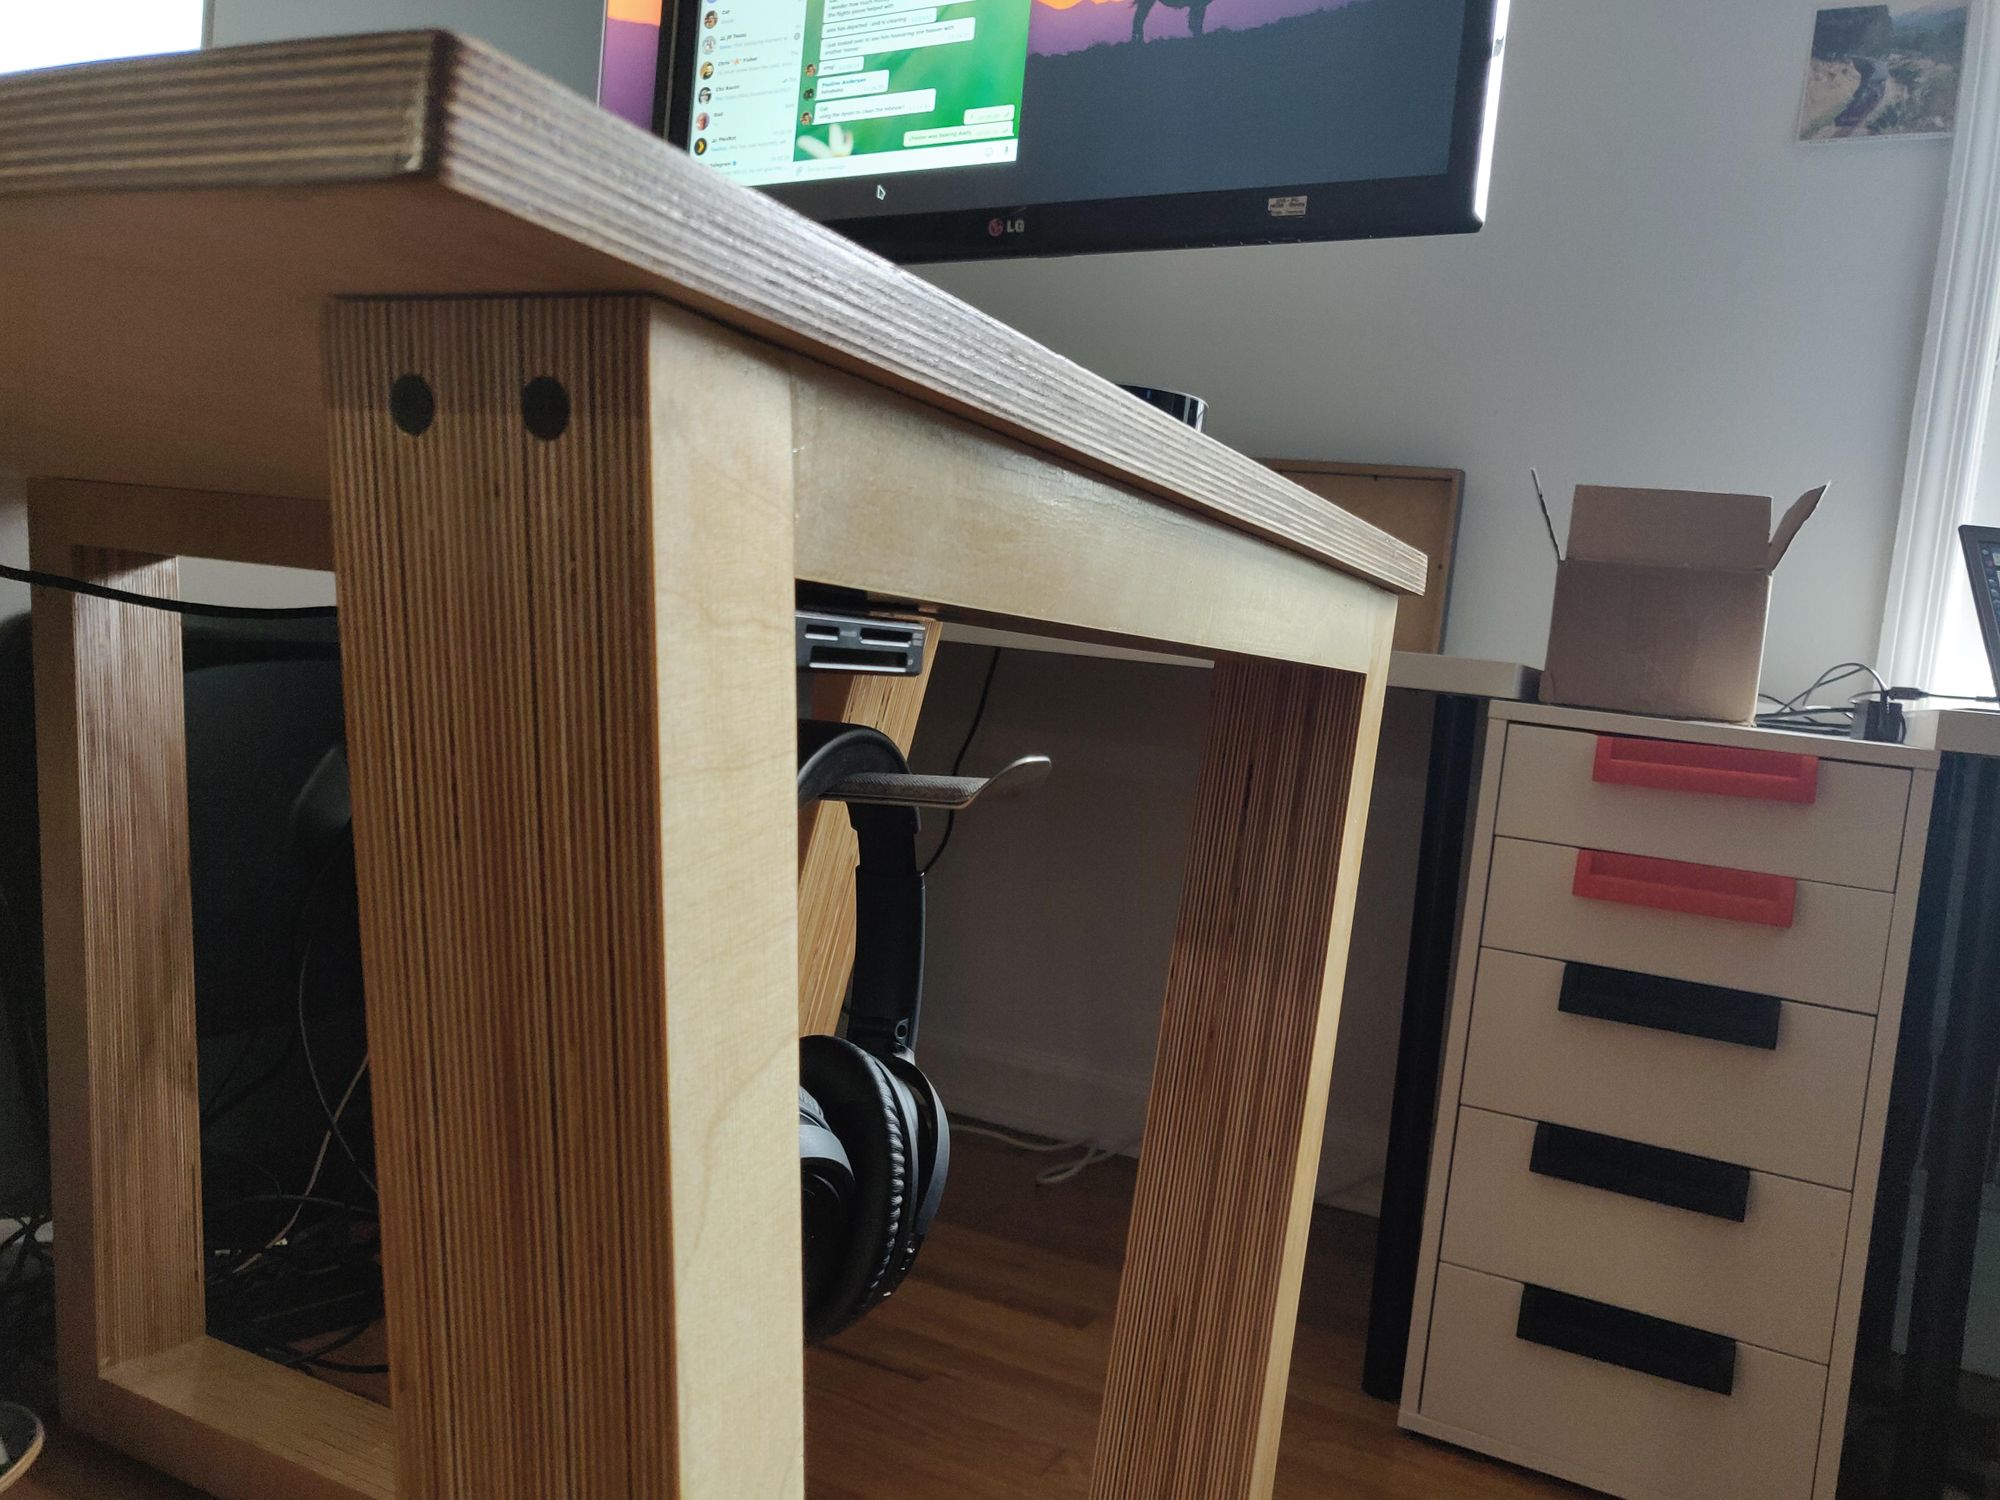
They’re the first things I made from wood that I’m truly proud of and I think the end result speaks for itself. They are unbelievably solid and I can’t imagine how heavy something would need to be to break them. Perfect for a megadesk!
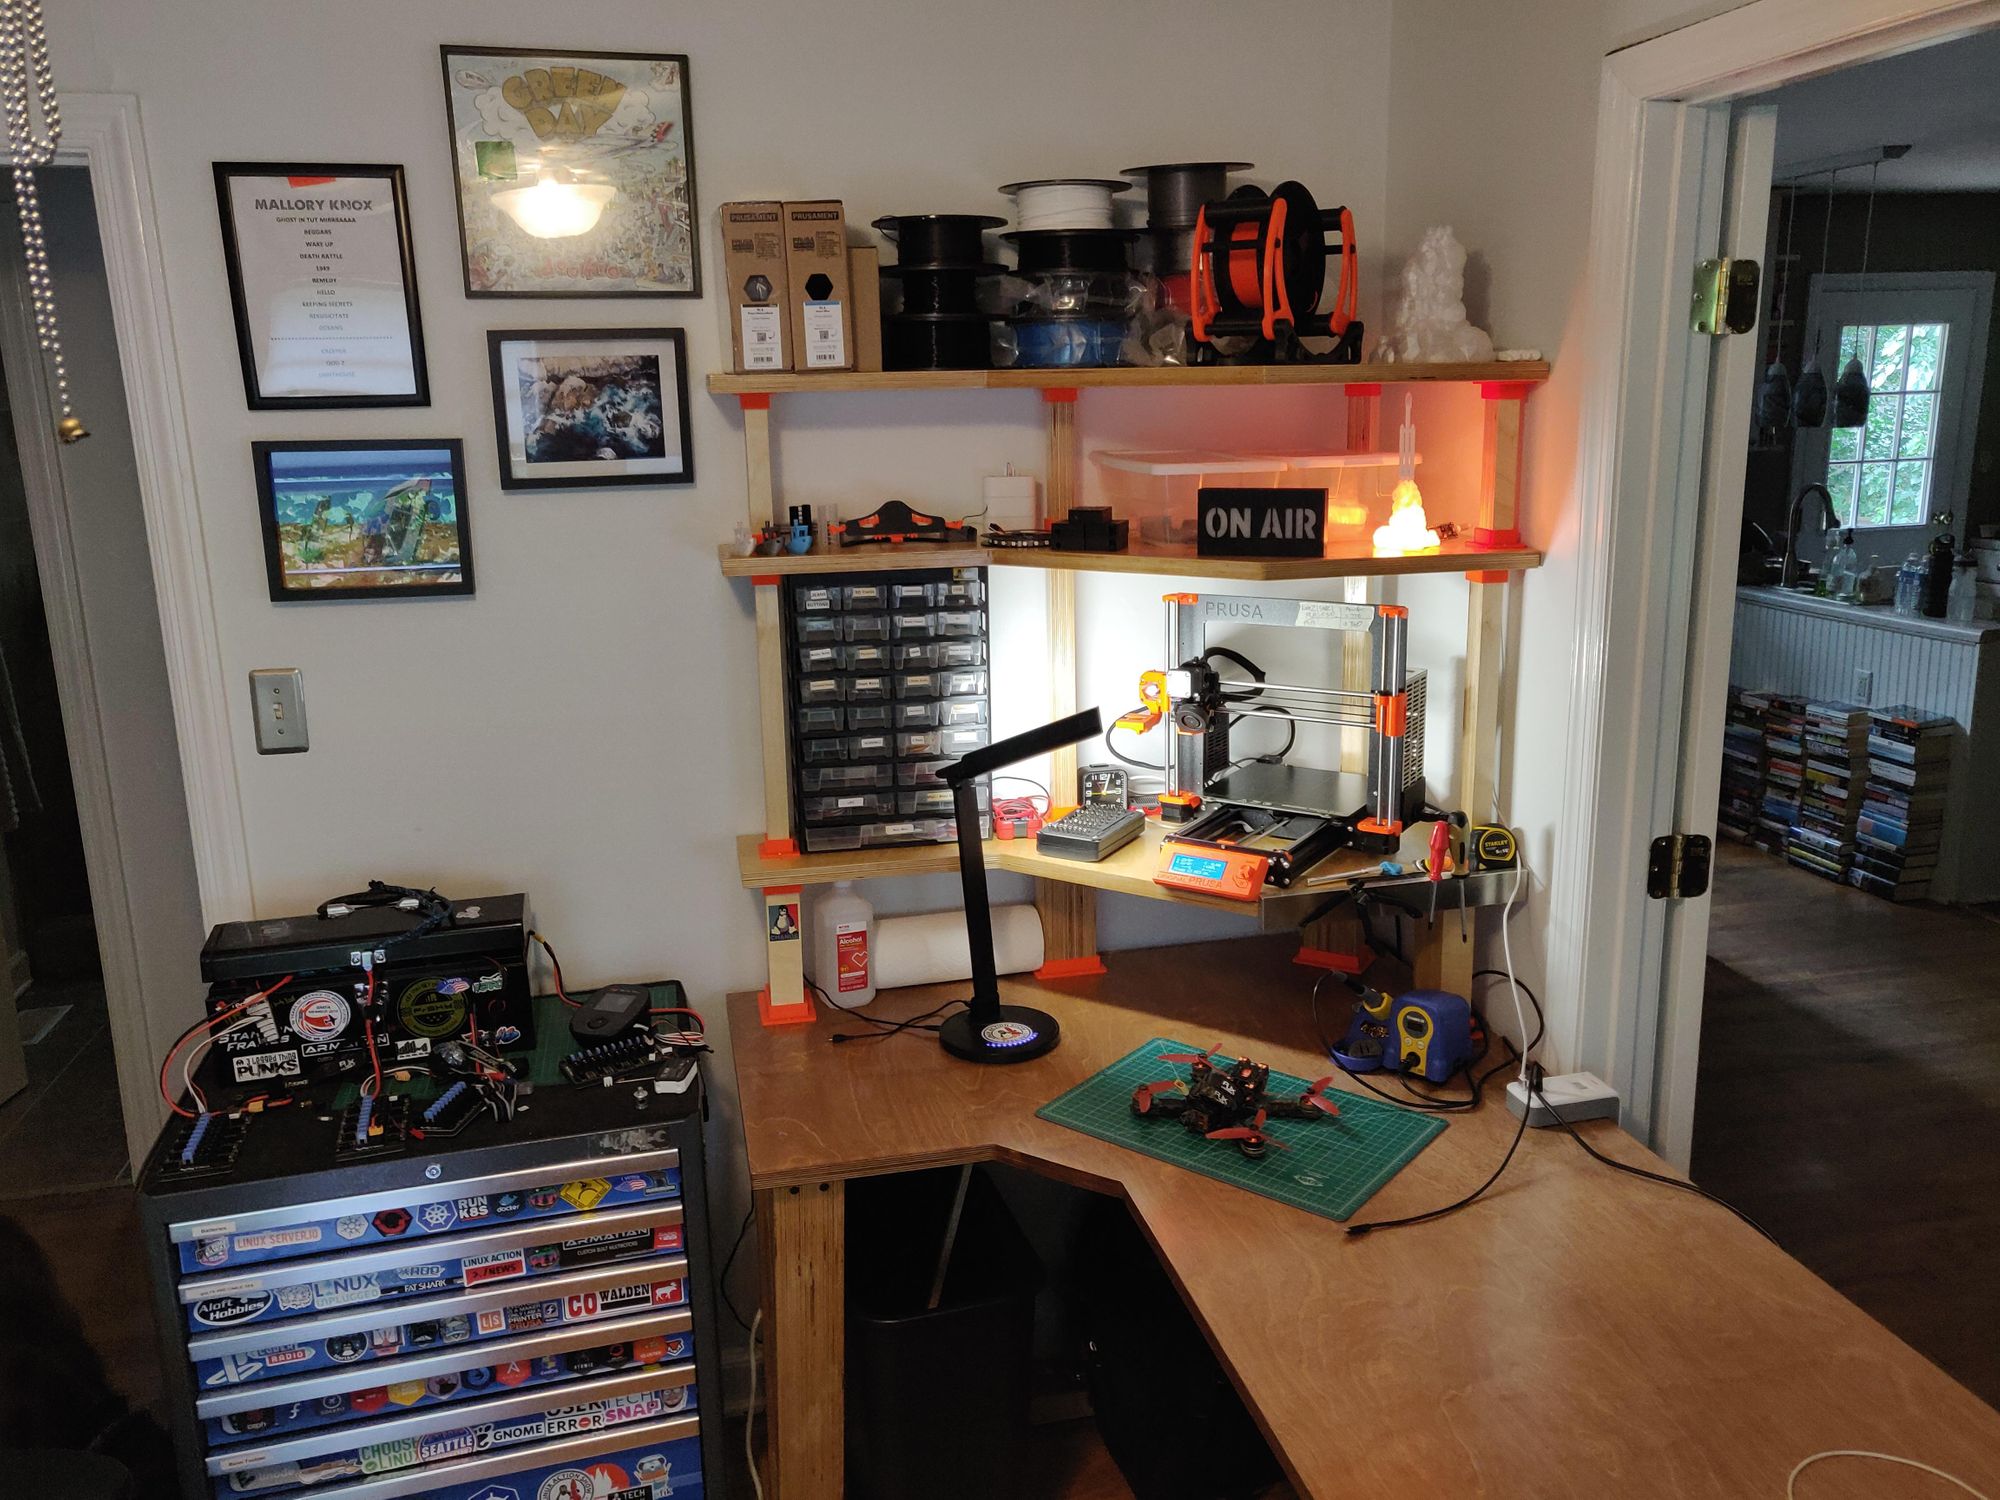
Drone battery charging on the blue chest. The 3d printer maximising vertical space - with the print bed carefully placed at eye level so as to be on nozzle watch without crooking your neck the whole time. And the electronics station under the printer.
A tidy little setup but it was very quickly overwhelmed with stuff because the blue chest was full and new things didn’t have a home. Without a home for new stuff, as well as old, you’re screwed.
Another important realisation I had is the way I work. Fits and starts. As motivation to start a new project hits me, the last thing I want to do is tidy up the last one. What happens? SHOVE. That’s what.
The existing crap gets swept aside into a nook to create just enough space to get started on the next, exciting project. In the new space, I’ve borrowed an idea I saw on YouTube somewhere - milk crates and garage storage shelves.
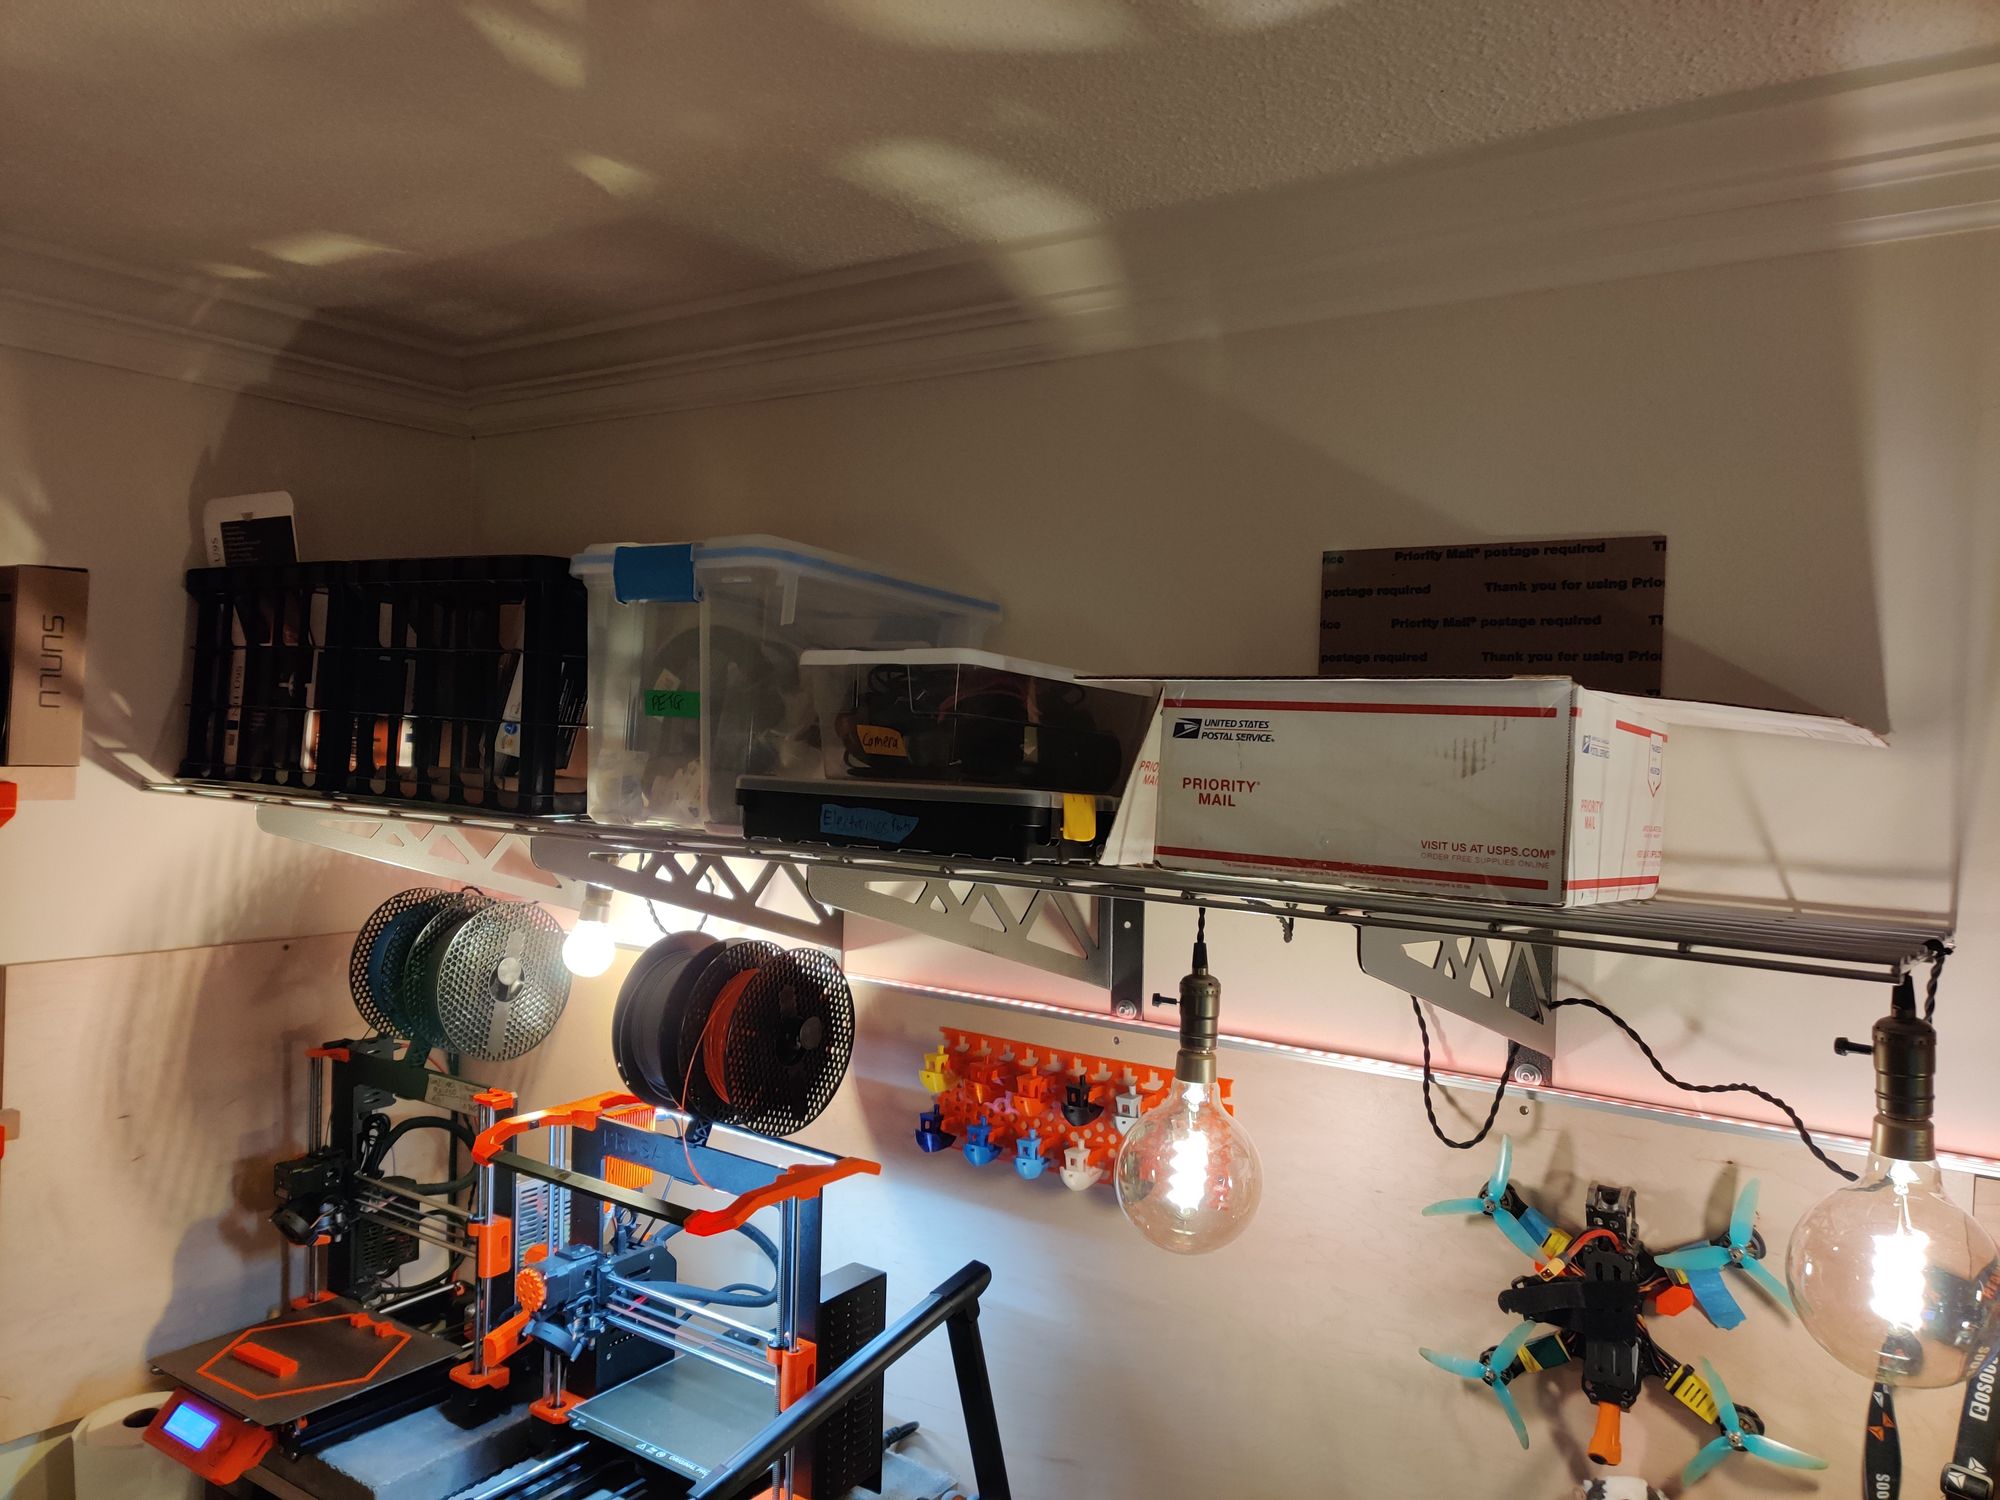
These milk crates allow entire in flight projects to be paused and stored out of the way. In other-words, they have a home. More shelves and crates are on their way to complete the run of the full 16ft occupied by the setup from end to end now I’ve seen how epically well this is working already.
As you can see, the shelves also double up as a convenient place to hang lights from. I think I’ll also try and design a 3d printed bracket to store the Harbor Freight black and yellow compartmentalised storage cases in the gaps between the brackets.
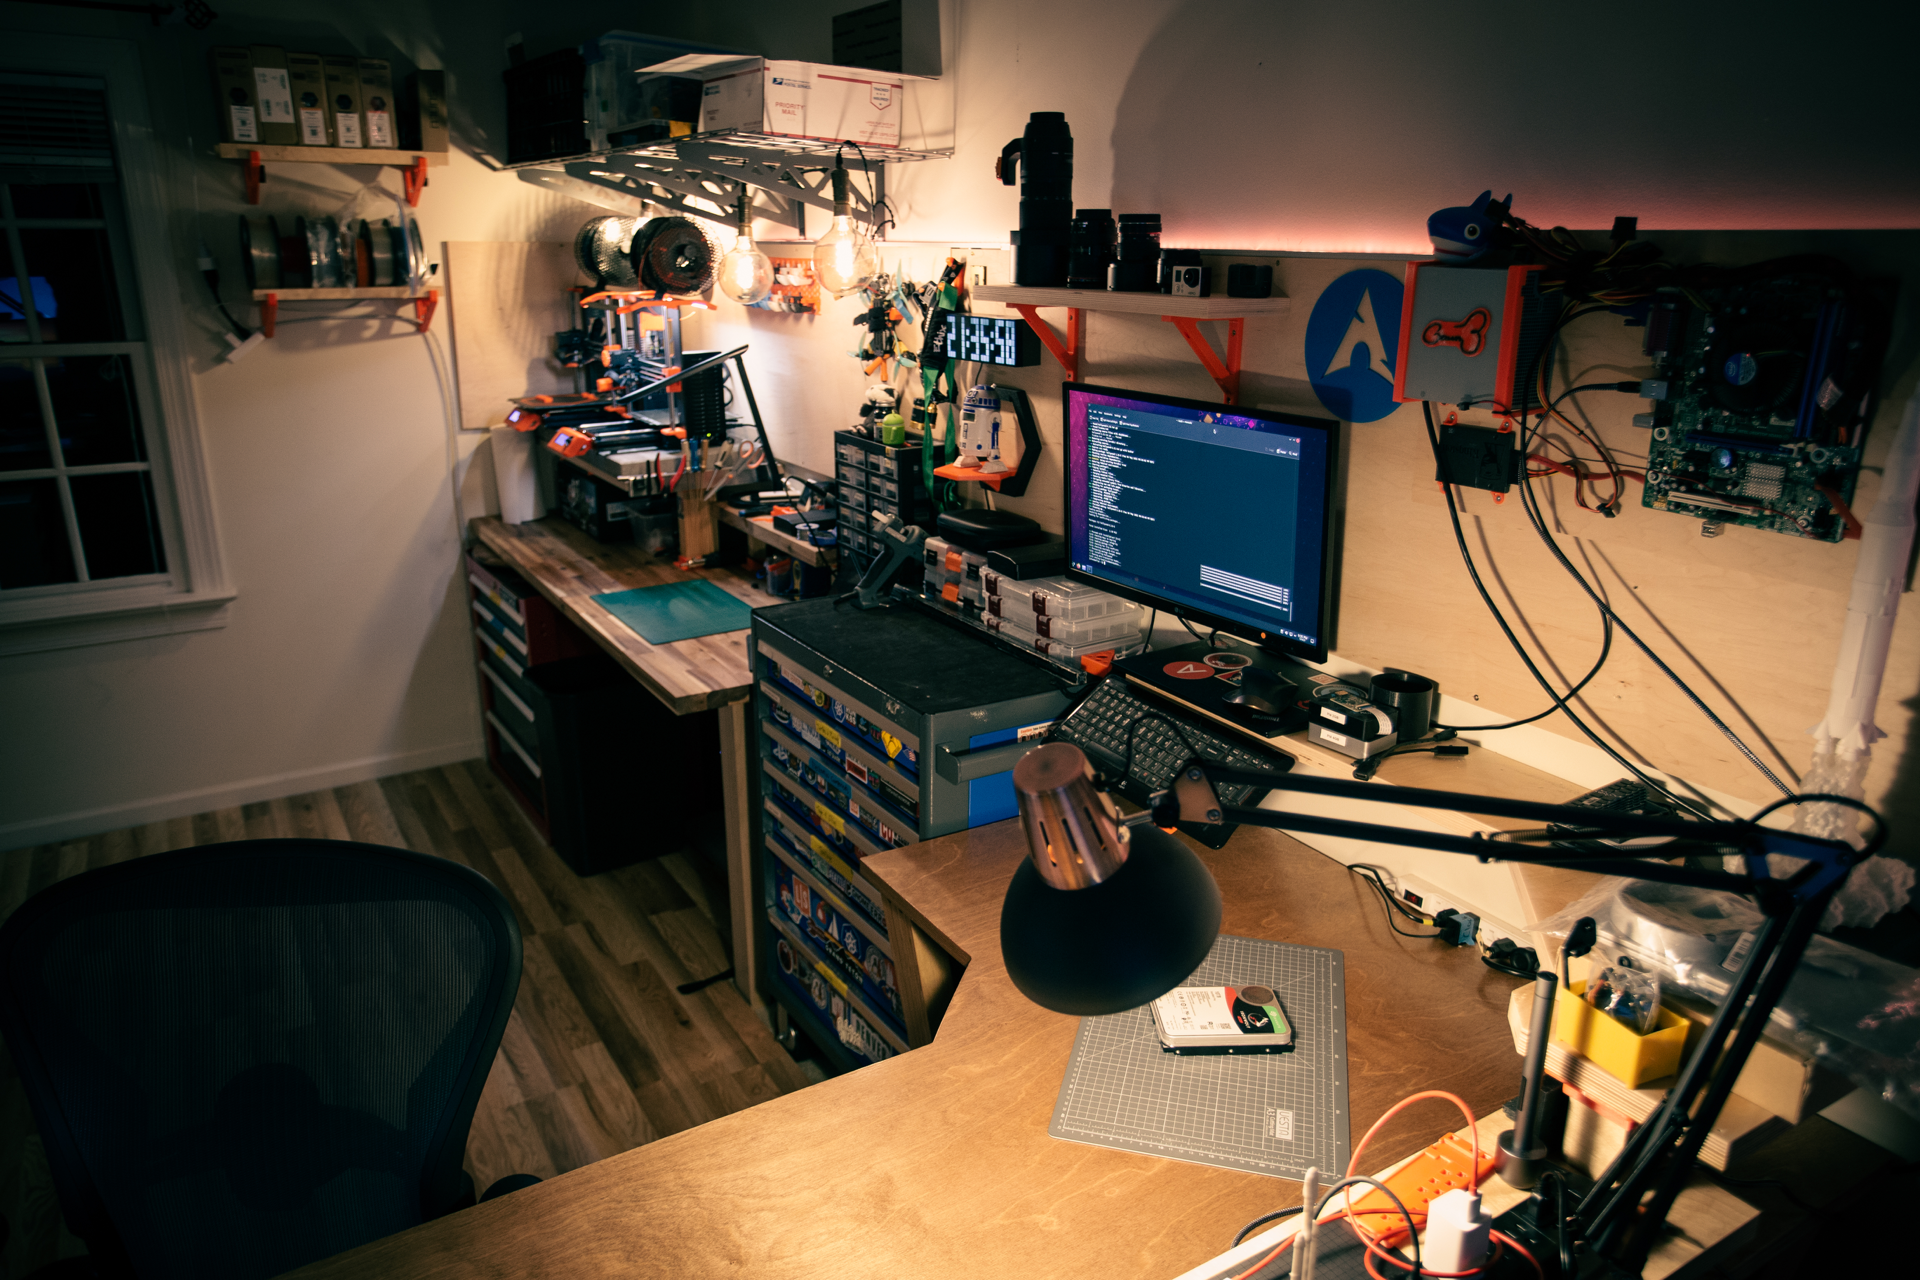
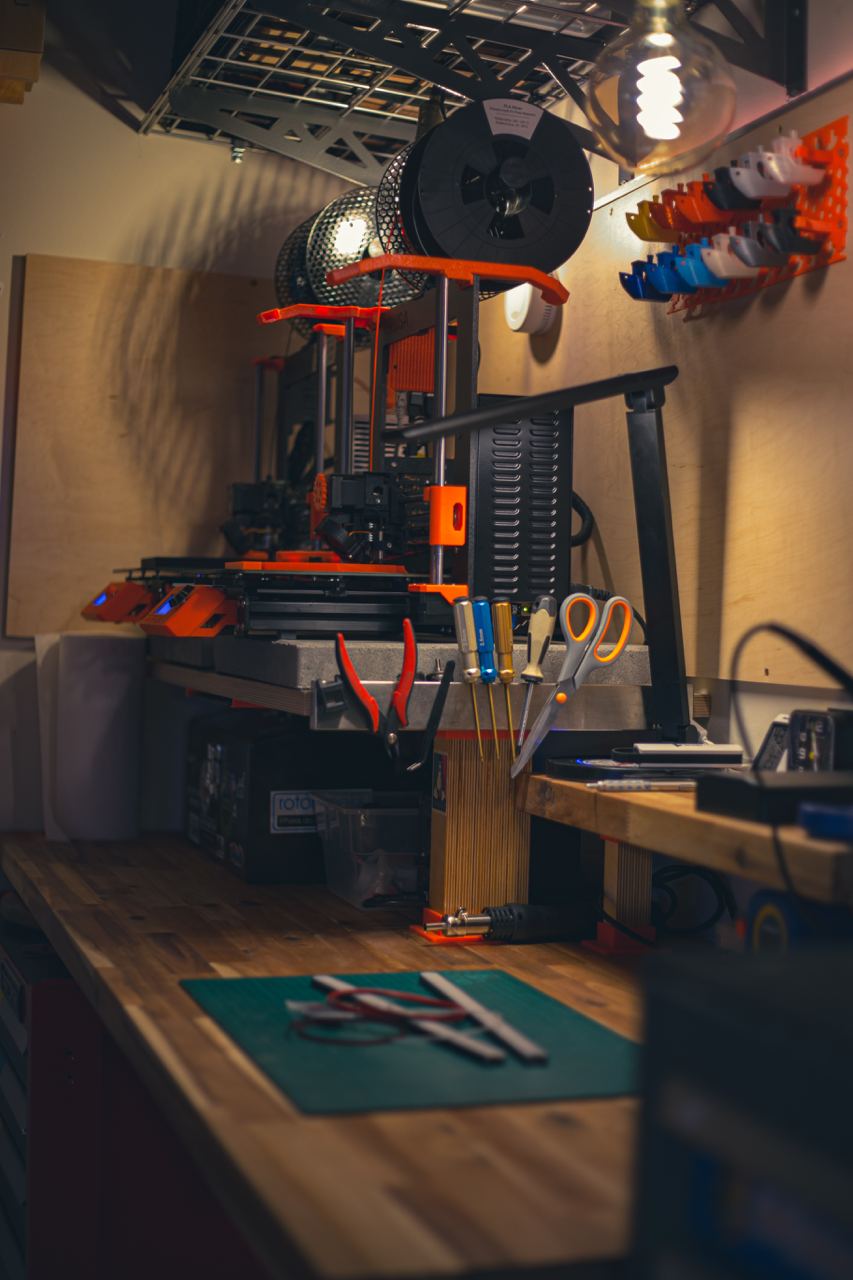
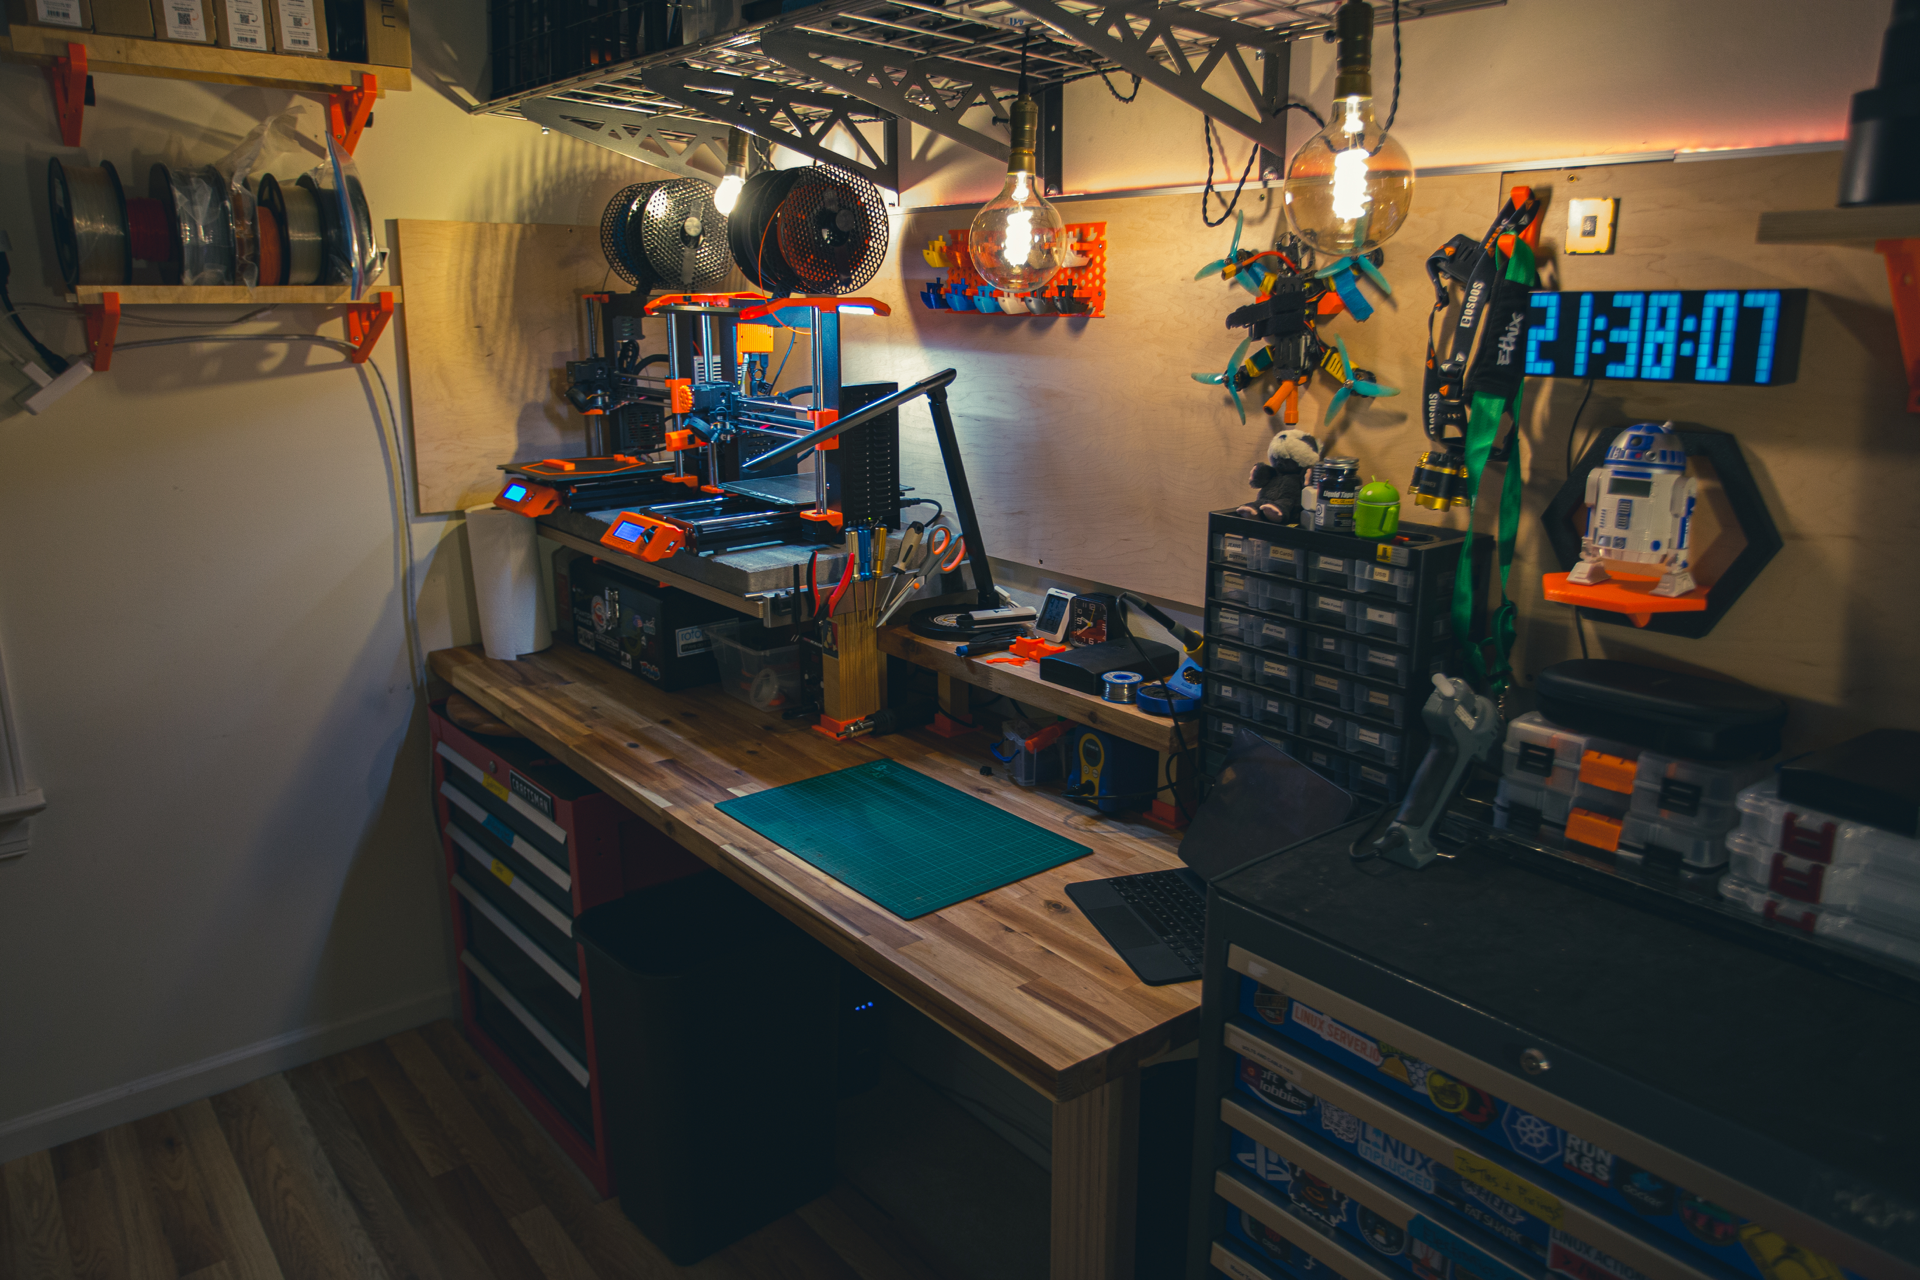
The Printer / Maker station
The second “desk” is really just a kitchen countertop from Lowe’s. An 8ft Acacia solid wood top that I trimmed a couple of feet from the end of it to turn into shelves and brisket sized chopping boards.
The wood is quite soft and the finish I chose, Danish Oil, is already showing a few marks. I think I’ll have to refinish the oil with a clear coat that is a bit harder wearing soon. Other than that, it looks great doesn’t it?
I was going to build cabinets of my own with bespoke drawers and storage for everything but Plywood prices at the moment meant that a beautiful metallic Craftsman chest came out significantly cheaper once I’d factored everything in like drawer runners and such. Not my original vision but in the end, I think it looks damn good.
I have a ton of off-cuts and scraps in my garage workshop and one of those was from the original creation of the megadesk. The leg for the new desk? An off-cut I saved when making the trapezoidal legs for the main desk. I knew I’d need it one day!
The material removed from where I’m sat right now, writing this, is the shelf used for the 3d printers. Concrete pavers are placed on top of foam pads to reduce vibration transmission as much as possible through increased mass. To finish the 3d printing station off a magnetic tool strip holds the most frequently used tools from both the printing and maker stations.
Maximising the use of space was a key goal. In order to make the most the wall space as flexible as possible and have a very high utilisation rate, I covered the entire area in plywood. Continuing the use of off-cuts, these two 8ft pieces are Maple ply pieces I’ve been storing for half a year to use “one day” - today is that day! They are 3/4” thick so I can screw anything I want to it and know it won’t go anywhere. I think it adds a nice dimension to the space and I plan on running solid wood edging around the entire panel eventually.
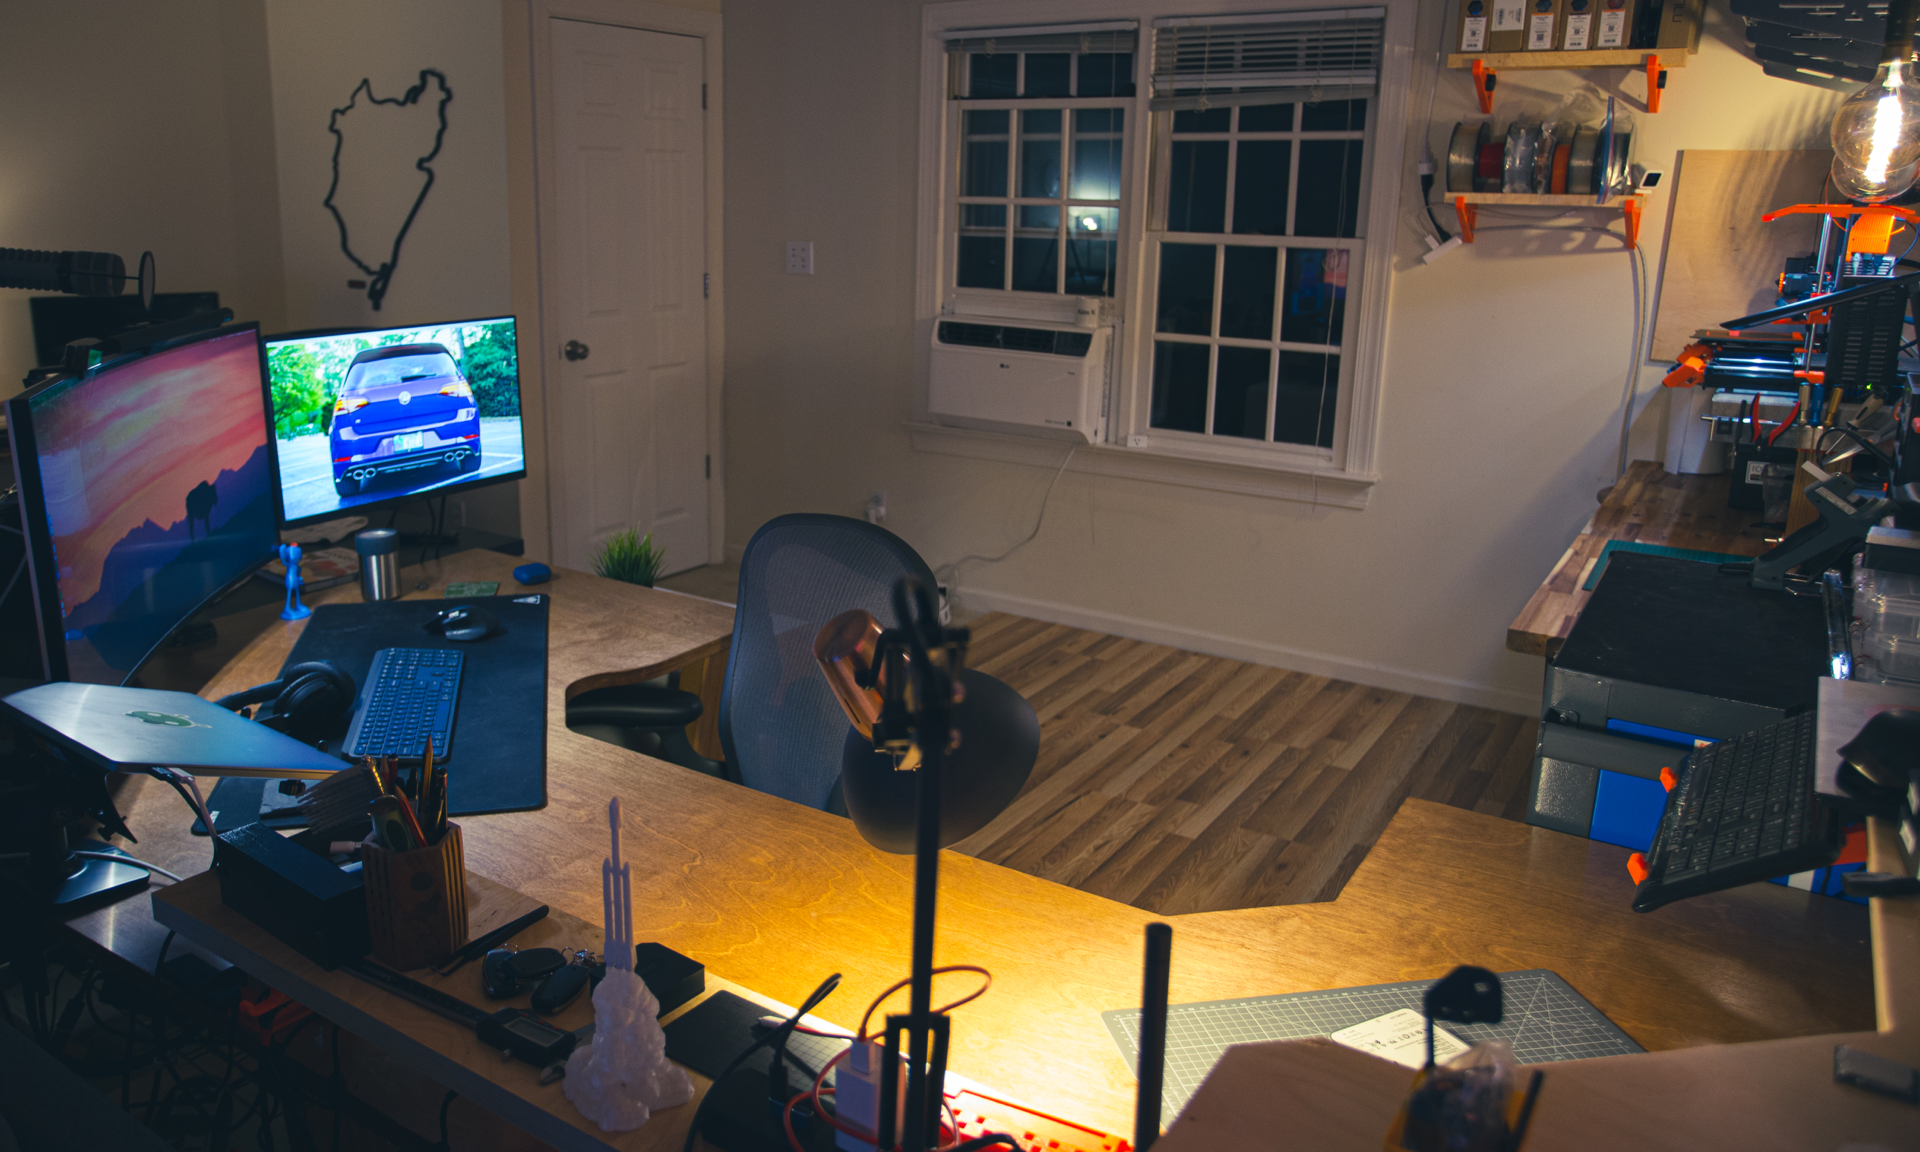
Primary Workstation Placement
If possible, I like to be able to see out of a window, see the doors to a room and the TV all at the same time from where I spend most of time here - in front of the computer. This current spot fulfills all those criteria perfectly and a really nice feature is that when I’m working from home here during the day I can open the laptop lid and not be distracted by the TV. At night, I fold it down and I can see Pickle Rick in all his glory.
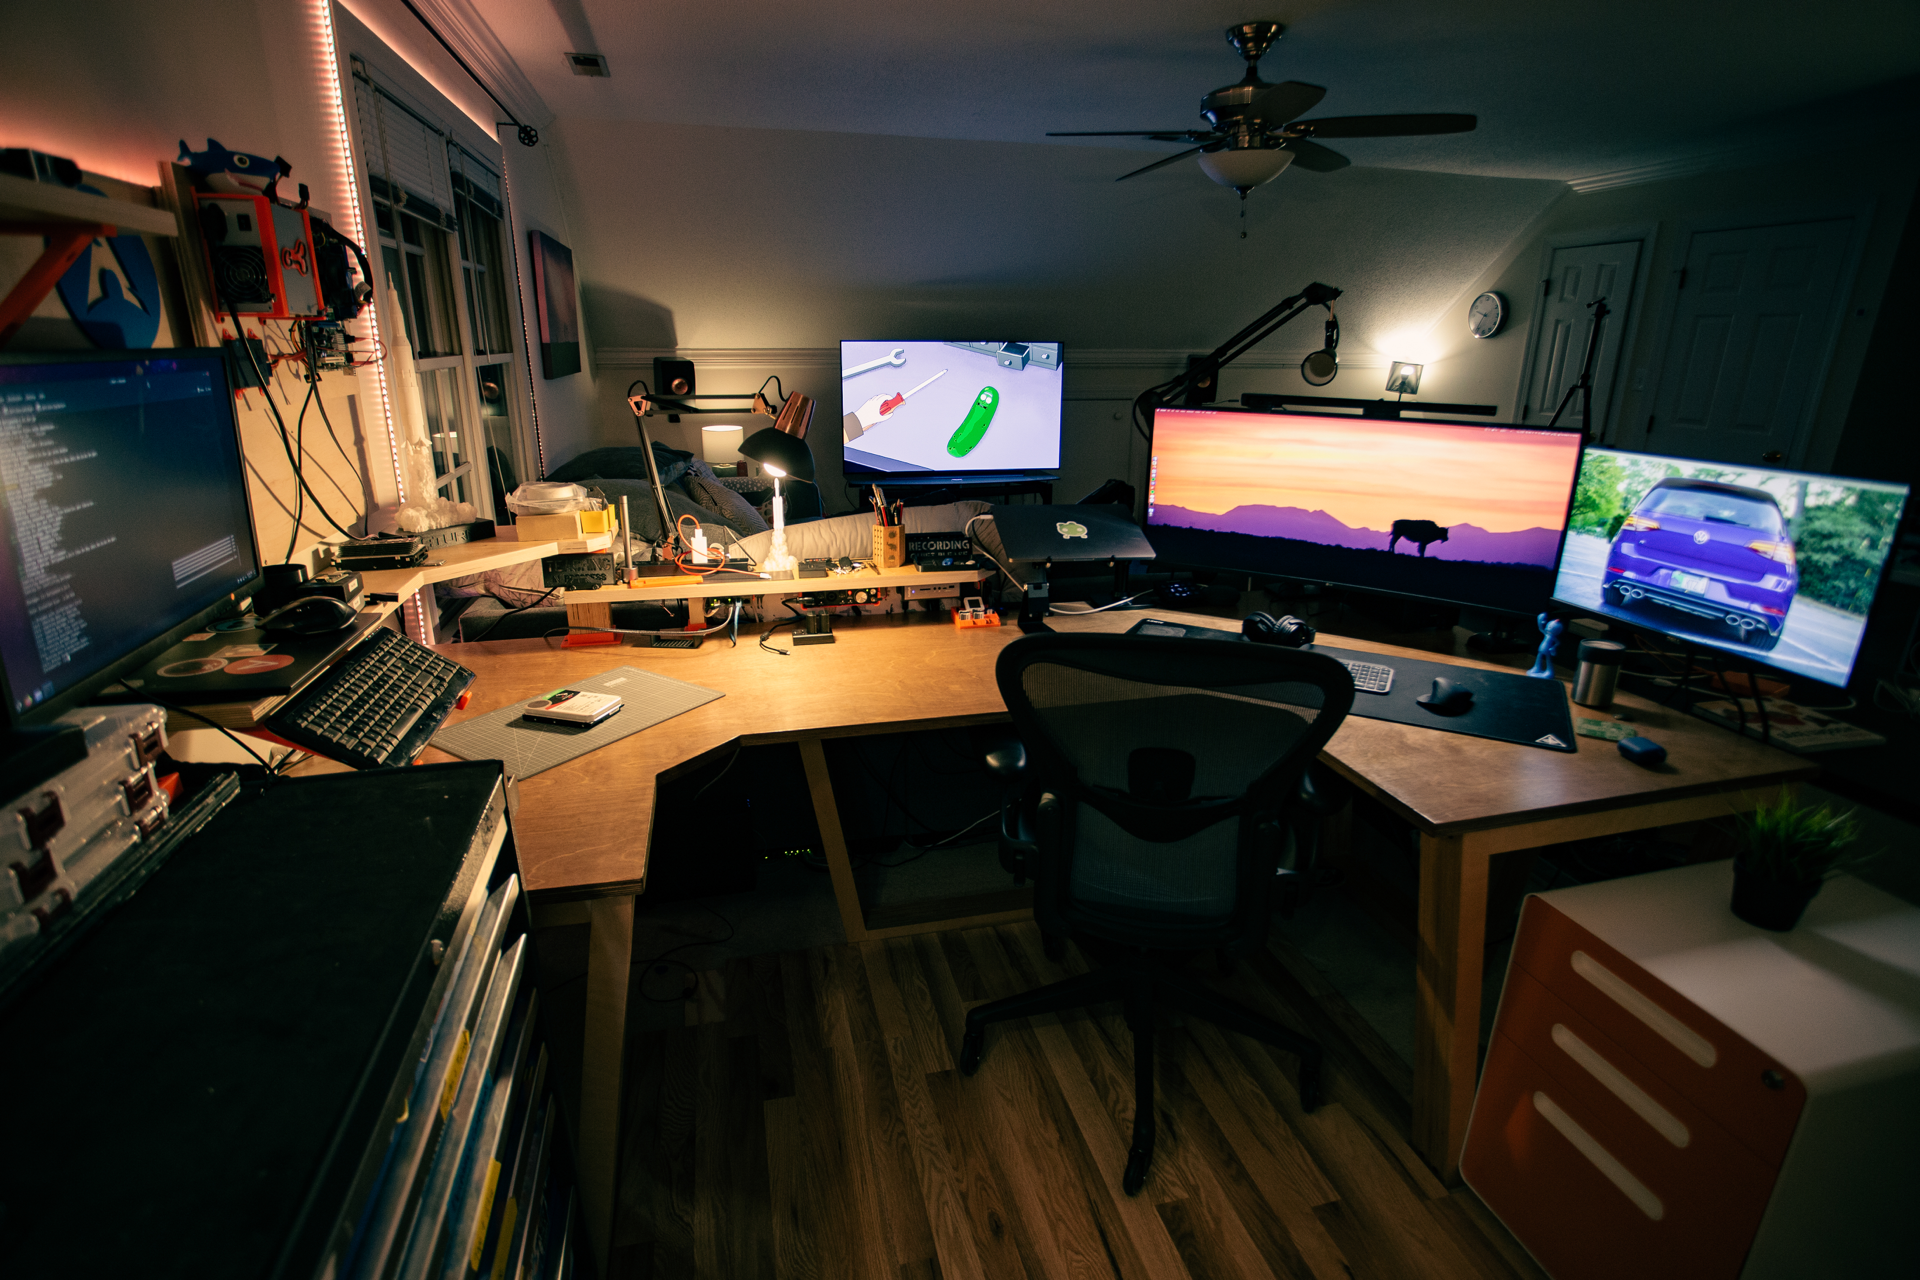
A simple set of metal drawers to my right keeps a lot of clutter off the desk. Infrequently used cables, sim removal tools, game controllers and such live in these drawers.
To my left is a small shelf, emulating my London setup where I had a window sill to create a two-tier desk. This slab of plywood actually used to be the top shelf in my previous rental setup incarnation. Under this shelf are mounted several key pieces of equipment such as my Caldigit Thunderbolt 3 dock, Scarlett 2i2 interface for podcasting and a gigabit network switch, because WiFi is that bad OK?

Having a landing zone for those random screws or things that just don’t quite fit anywhere else is very important as well. To achieve this each category of storage has an unsorted bin where I can just dump stuff and sort it later - the key is that I do sort it later though and time will tell on that one!e
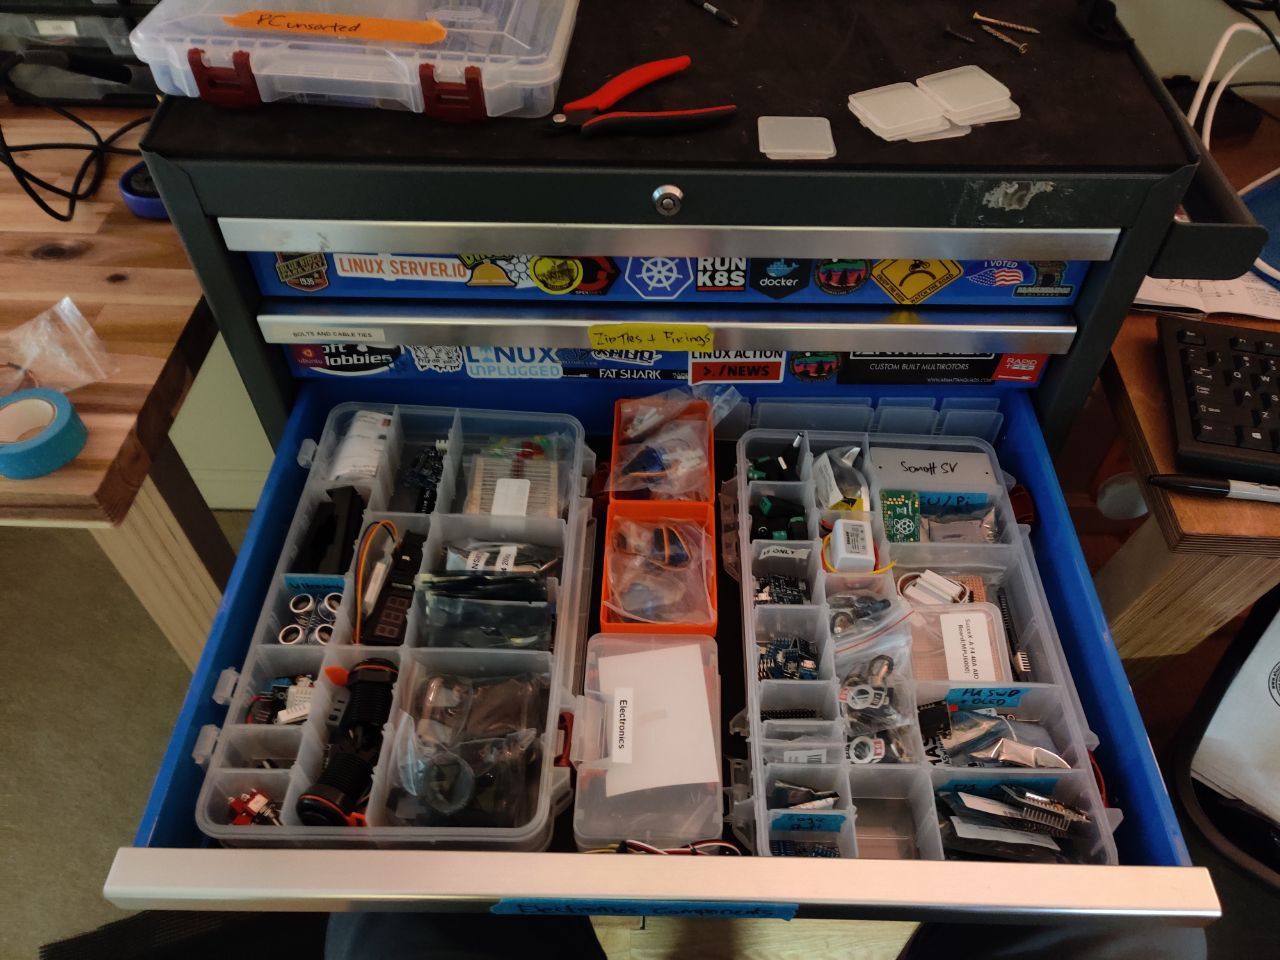
I’ve taken to using fishing tackle boxes available at Walmart instead of custom printing dozens of custom bins. This would be cool but the cost of filament vs these Walmart units just doesn’t make sense.
Fin.
I feel like I’m coming to the end of this post now but if you have any questions about the gear you see or anything like that you can find me on the Self-Hosted podcast Discord as @alexktz.