If you have a Behringer X32 Rack mixer that won't power on correctly and kind of just sits there blinking at you then you probably have a bad power supply.
I bought a used X32 Rack mixer unit off of Reverb and after about 75 days the unit began exhibiting these symptoms in the video. Neither Reverb nor the seller cared any so I began the hunt for a fix.
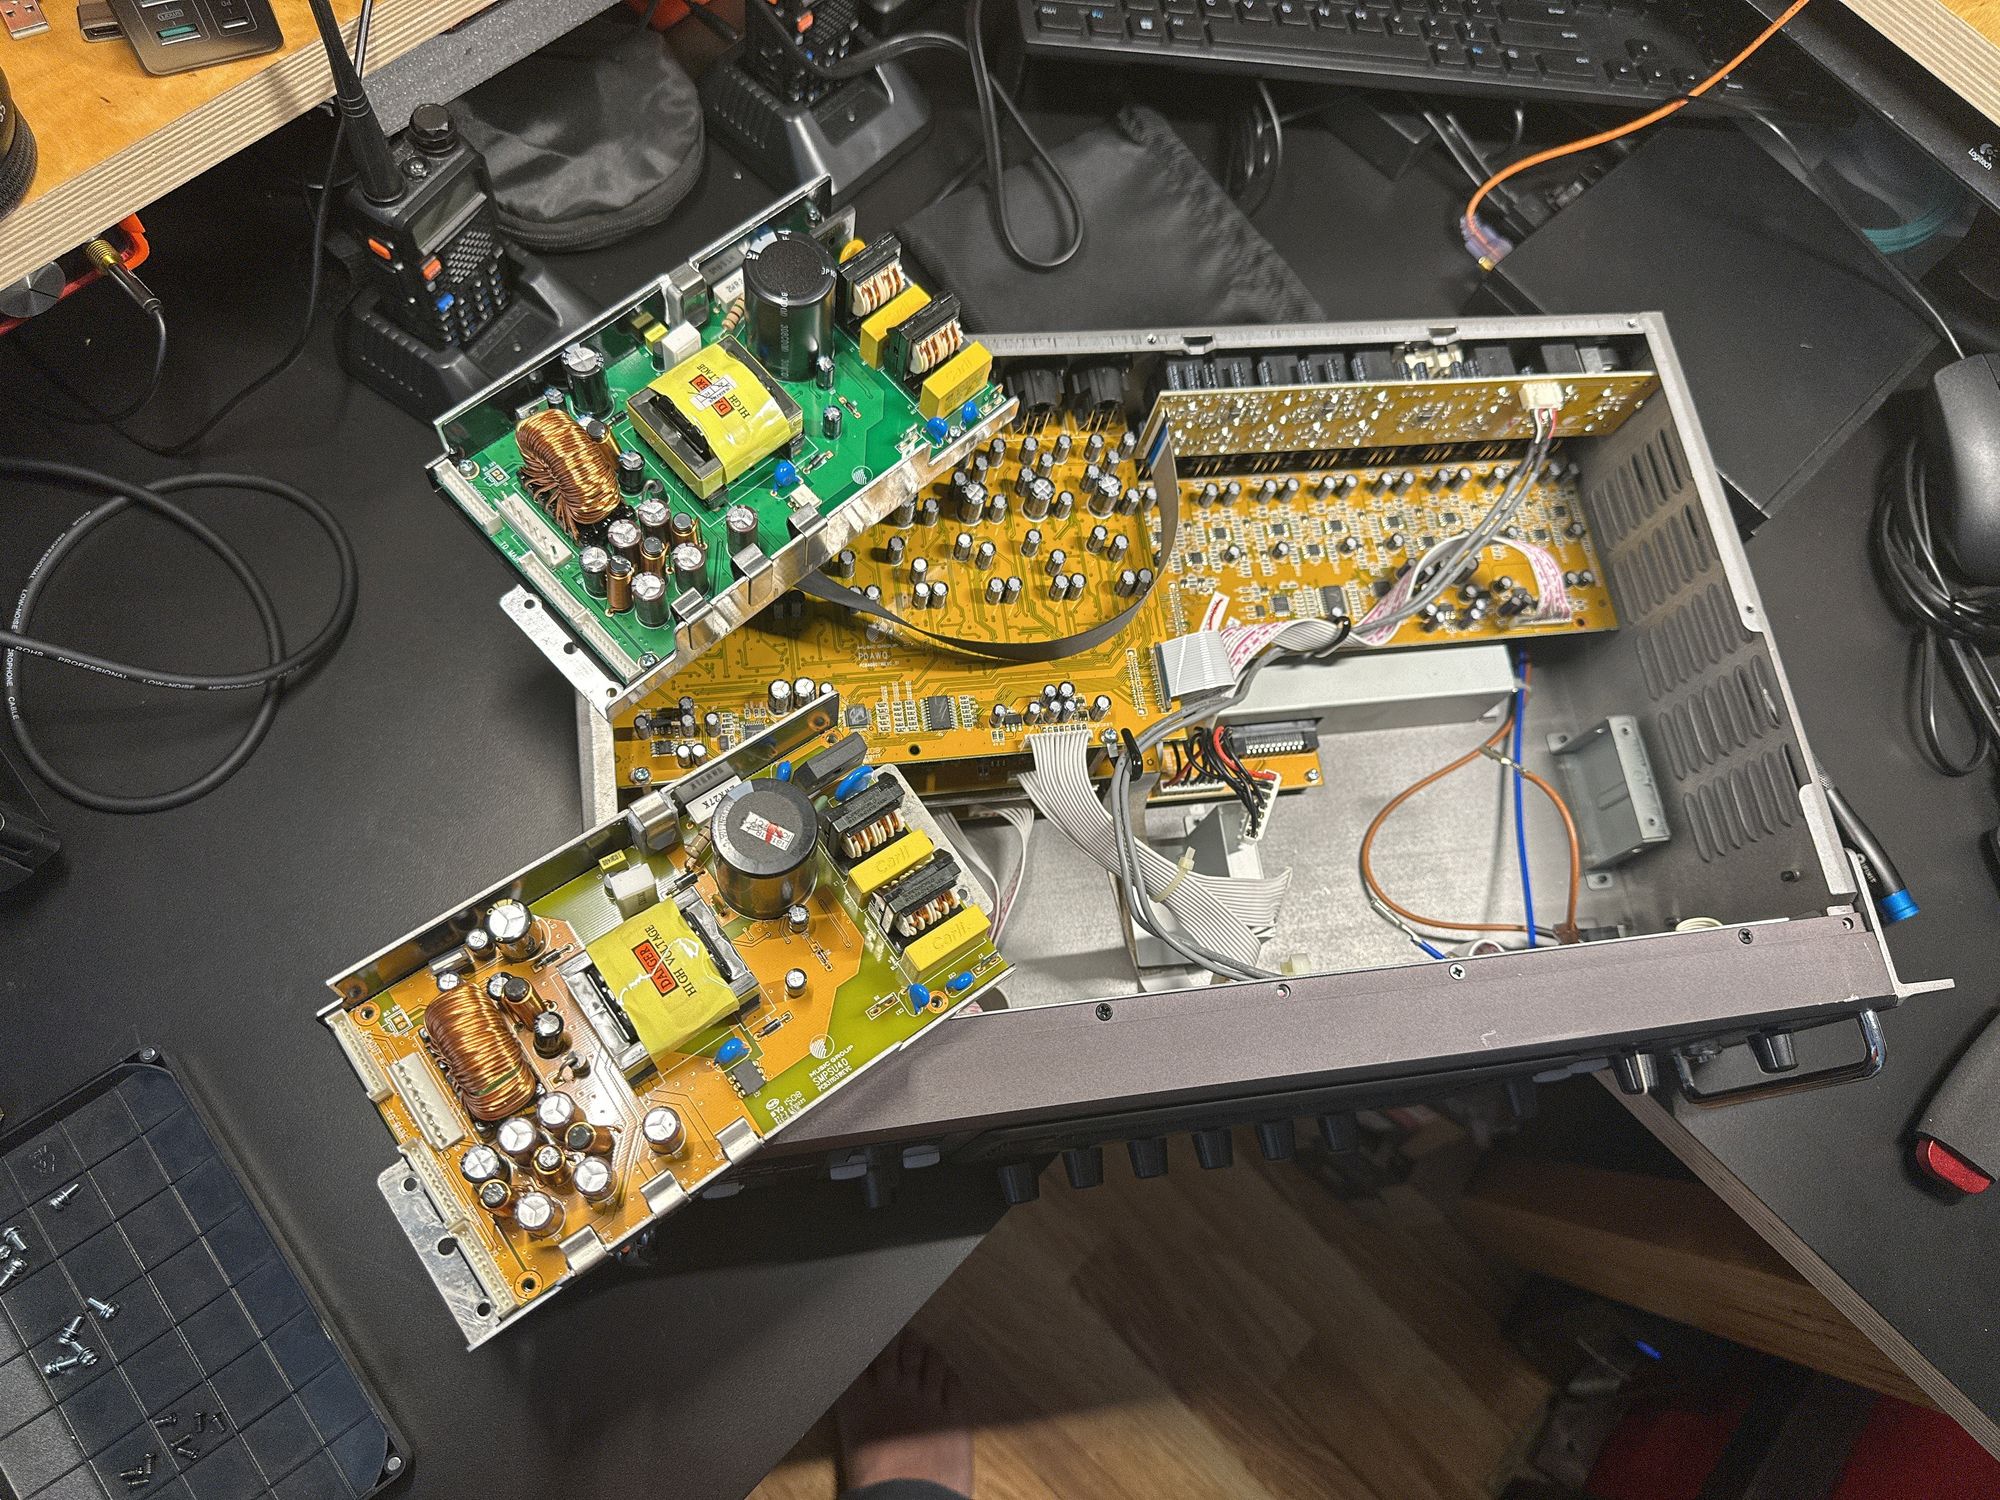
The mixer itself is a $1600 unit brand new so it's worth trying to fix it. The power supply itself is a fairly easy repair with only 4 screws and about 6 connectors to remove - it legitmately took me about 20 mins to swap it out. Connecting and reconnecting the XLR cables in the back took longer than the repair.
What to buy
You will need to buy the part number SMPSU40 which is the X32 Rack power supply board.
I found mine via AudioLab of Georgia. I have been keeping an eye on Reverb, eBay and other places including AudioLab for about 6 months - stock is not easy to come by. You will likely have to back order this component but I wanted to confirm for you that this part from AudioLab fits and works. Their part number is A09-AWN00-00000.
How to do the repair
Please be careful here. This is a very dangerous repair if you're not sure what you're doing. This is an AC switching power supply with mains voltage. Do not proceed until you are completely sure that there is no risk to you.
The repair is stupid easy. Take the 6 black screws out to remove the top of the mixer. Next take a photo of the mixer before you touch anything just in case you need to refer back to it later. Then disconnect the 3 ribbon cables on the left side of the power supply board (front bottom right). Next, disconnect the power supply connector next to the copper coil loop.
The next bit is a little tricky and is where you'll remove the two mains AC wires which are blue and brown. The spade connectors have a little release on them if you slide back the plastic jacket and depress the release, they will pop right off.

You do not need to remove the 4 silver screws screwed into the power supply board. Instead, remove the 4 screws holding the metal carrier bracket into the mixer chassis.
Swap out the PSU board.
Reassembly is the reverse of disassembly. Take a moment to double check the connections you made vs that photo you took before you did anything and then it's time to test!
Thanks for reading and good luck.
