

What do you do when you want to tinker with a bare metal system? For years, I'd go drag an old monitor, keyboard, and mouse out of a cupboard. Then, I'd inevitably spend 20 minutes looking for an ethernet cable that was the right length before finding that I had the wrong power cable.
A few weeks ago I had an epiphany. The kind that once you have it, is so stinkin' obvious you wonder what on earth you were thinking all this time by not seeing it!
Put a PiKVM in your desk area!
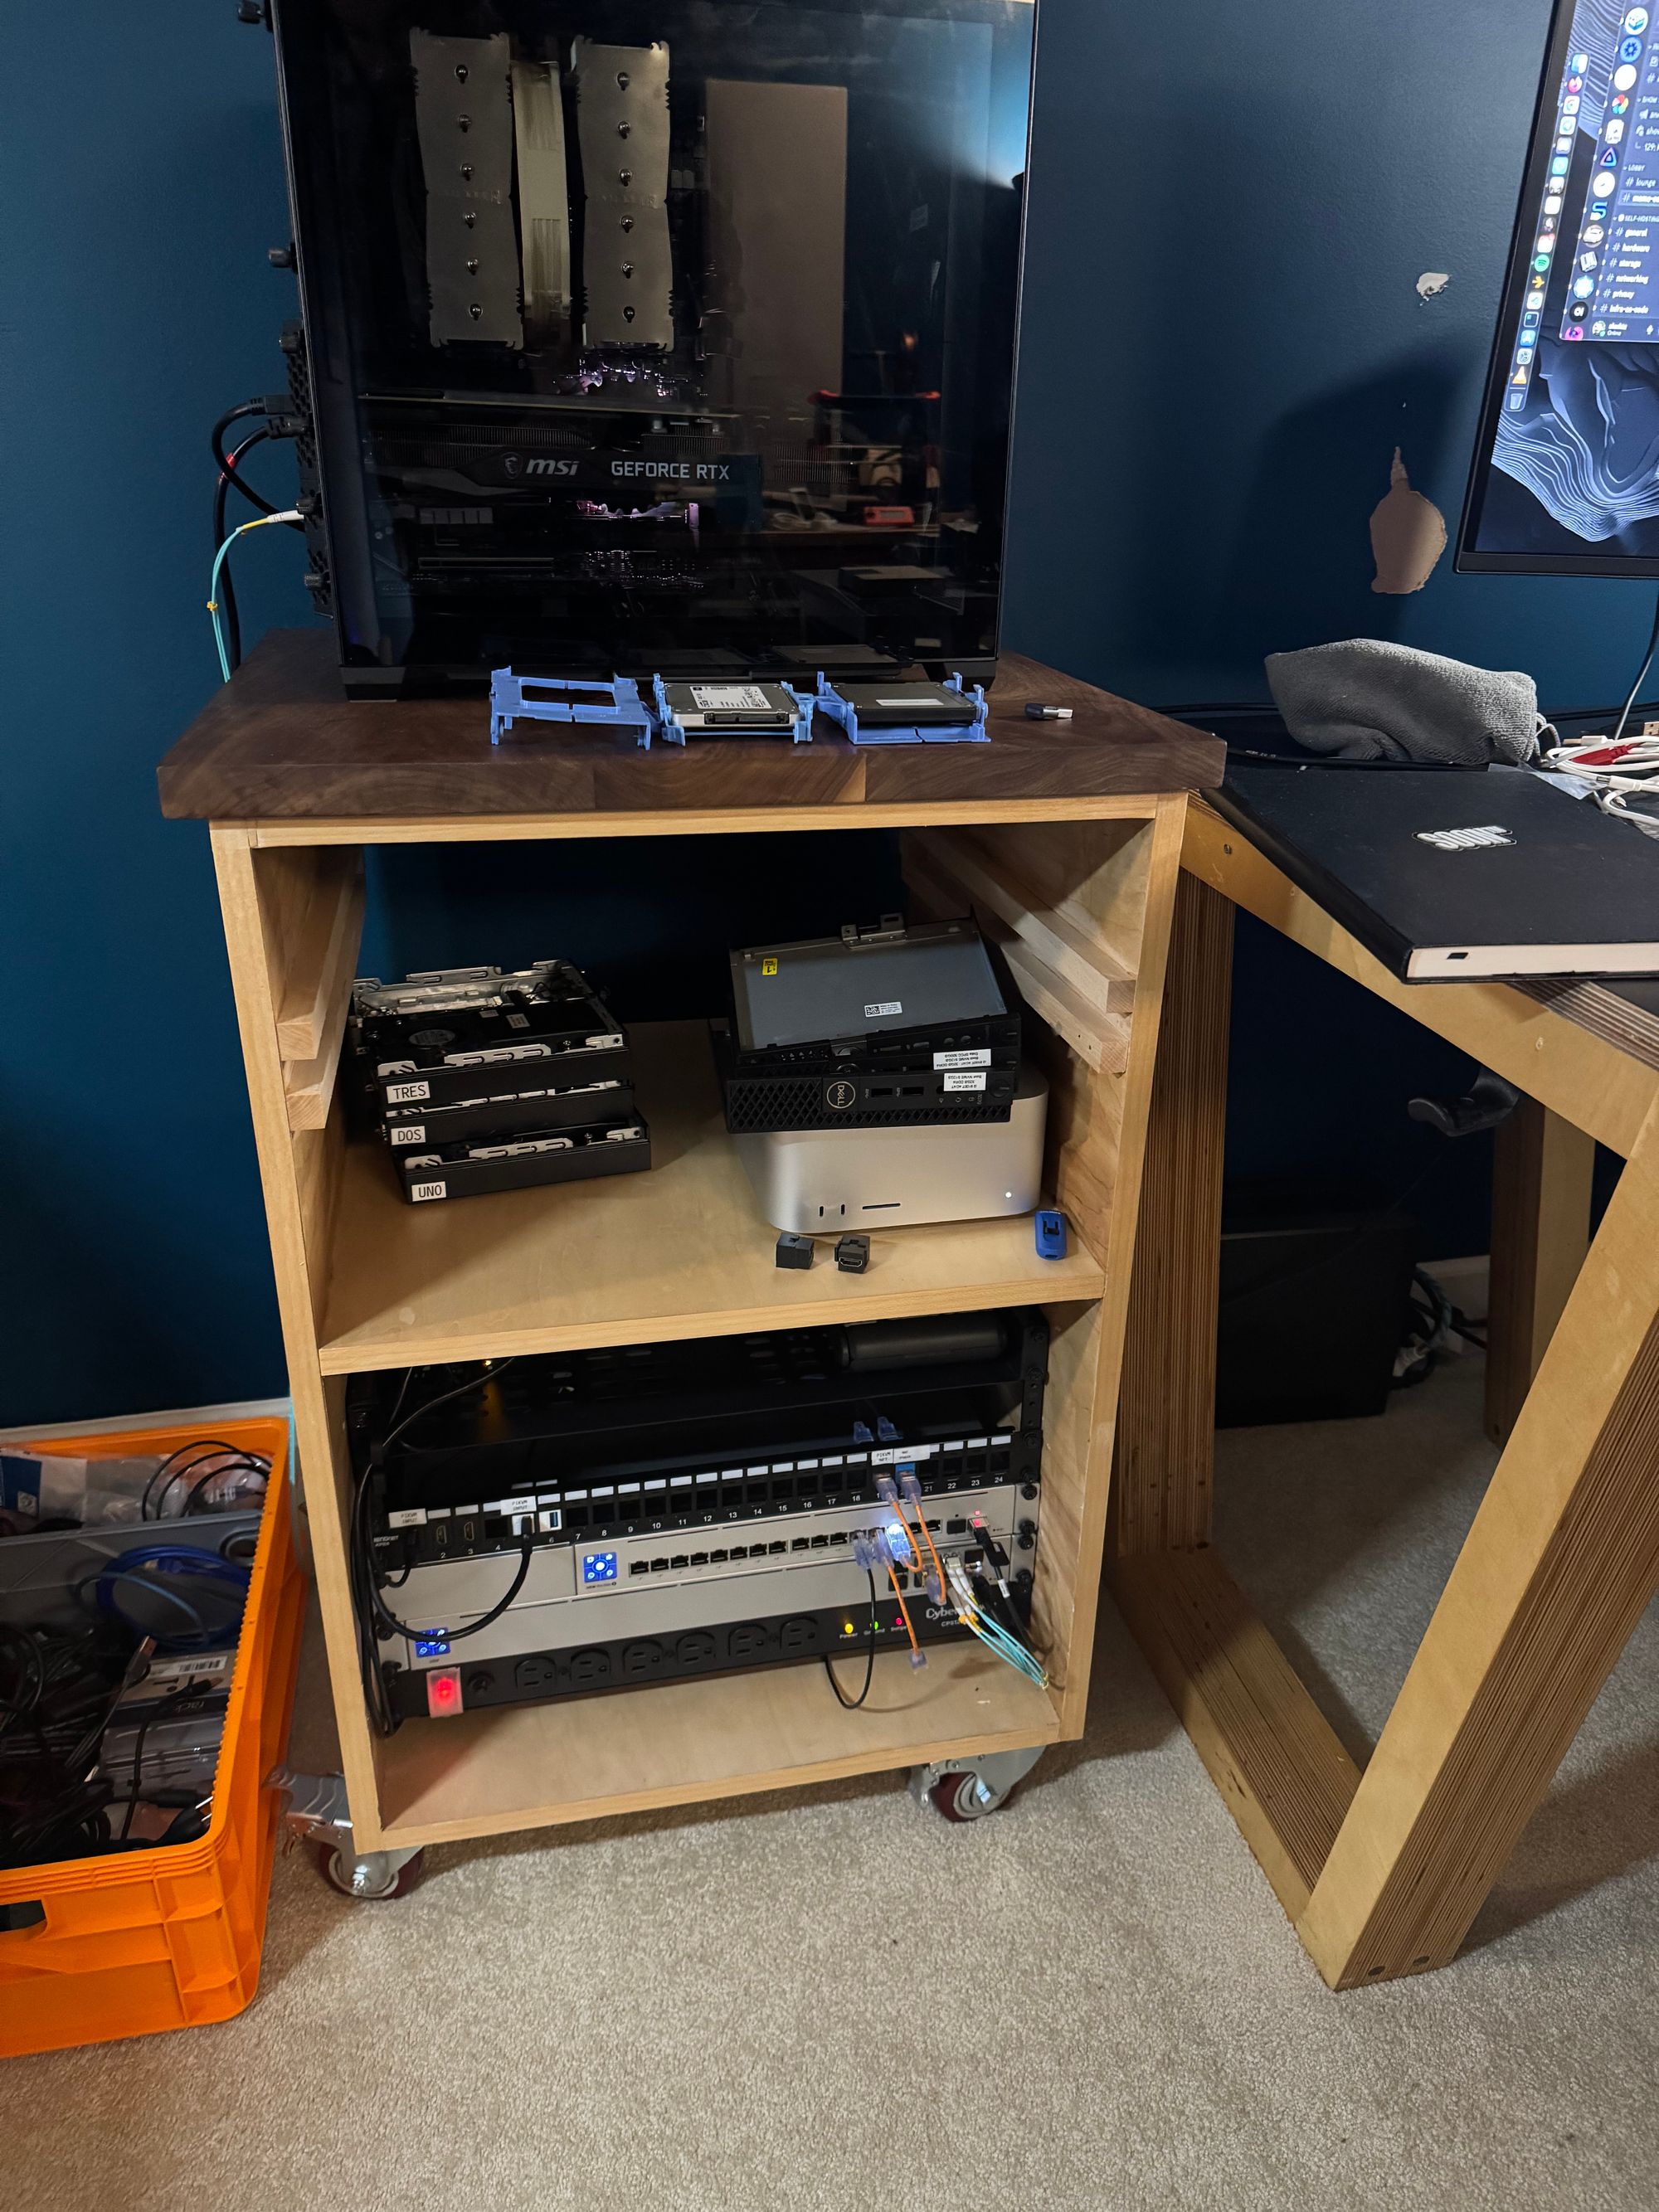
In the picture above is the brand new sidecar rack I built for this endeavour from plywood and a solid Walnut top. The goal is to house all the computers and cables that typically live on my desktop in a single spot reducing the cable management overhead under the desk, and reducing clutter on top.
Working up from the bottom we have a rack mount PDU with outlets on the front and the back. This is fairly obvious, but what isn't so obvious is that I raised this off the bottom of the cabinet by about the width of a finger so as to give space for cables to route from front to back.
Next up are a pair of Unifi switches. One 10gig aggregation switch with 8 SFP+ ports, wired back to the main network via single fibre cable. This provides 10gig speeds for my desktop and Mac Studio. The second switch is a brand new Unifi USW Pro Max 16 switch which has a pair of SFP+ ports, 4 2.5GBe ports and 12 GBe POE ports. That should cover every type of device and gives me plenty of room to hook things up.
Now we get to the patch panel. This is where things start to get interesting. In order to have a constant to aim for it's important that I'm not hooking external devices into the PiKVM directly. Instead, I'll hook those up to patch bays which never move. This means I can acquire fixed length, matching cables and cable manage these things in such a way that when not in use they don't look like a drunk octopus and yet, it's less than a 30 second mission to hook up a system.
There are HDMI passthrough keystones, USB 3 passthrough keystones (though the PiKVM is limited to USB2.0 speeds due a chipset limitation it's nice to be future proof), and some ethernet keystones. It's a really simple concept but takes a bit of planning to get the right length cables and such lined up.
I'm using the Monoprice slim ethernet cables in all my racks for the last few years and am really happy with them.
The final and top most item in the 6u of rack space is a simple rack shelf. This is where the PiKVM lives and gives me a spot to put smaller systems whilst they're in the area of the rack.
The end result is a complete success so far. I think everyone should get a PiKVM for their rack. You don't need the expensive productised version, but really some kind of HDMI capture device hooked up to a system with the ability for USB control will do the trick. You can put together a DIY PiKVM for around $100 and for the extra convenience it provides, that's a small price to pay.